Mostrando entradas con la etiqueta meriendas. Mostrar todas las entradas

domingo, 30 de octubre de 2022

BIZCOCHO VEGANO (FALSO) RED VELVET


Ingredientes para el bizcocho
- 500 ml de leche de almendras (aunque también puede ser de arroz, o avellanas)
- 200 ml de aceite de girasol
- 1 remolacha cocida (machacada)
- 500 g de harina de repostería
- 150 g de azúcar (moreno)
- 1 sobre de levadura para repostería
- Nueces hechas trocitos.

Ingredientes para la crema (aunque yo no la hice)
- 250 g de queso de untar (opción vegana)
- 200 ml de aceite de girasol
- 90 g de margarina vegetal
- 100 g de azúcar glass
- 150 g de nata para montar (opción vegana)

1. Mezclas 
Mezclamos los ingredientes húmedos: LECHE + ACEITE + AZÚCAR + REMOLACHA MACHACADA.
Después, ponemos en un bol la harina y la levadura, los mezclamos y los vamos tamizando con un colador  sobre nuestra mezcla húmeda. Tendremos que batir con una varilla manual para que se integren todos los elementos.
Añadimos las nueces troceadas.

2. Horneado
Vertemos la mezcla en un molde de horno alargado, que previamente habremos forrado con papel vegetal (esto nos ayudará a la hora del desmolde). La temperatura de horneado será de 180ºC, y habrá que dejarlo durante aproximadamente 40 minutos (pinchando el centro del  pastel con una varilla iremos comprobando si está hecho por dentro. Deja que se enfríe y disfrútalo.

3. Relleno (opcional)
Batimos la nata con el azúcar Glass hasta que la mezcla sea consistente, luego le añadimos el queso vegano y mezclamos de nuevo.
Incorporamos la margarina y ya queda listo nuestro relleno o cobertura. Úsalo como más te guste.

NOTA: La receta original es la siguiente: https://okdiario.com/recetas/receta-red-velvet-vegana-5773158

************************


domingo, 4 de marzo de 2018

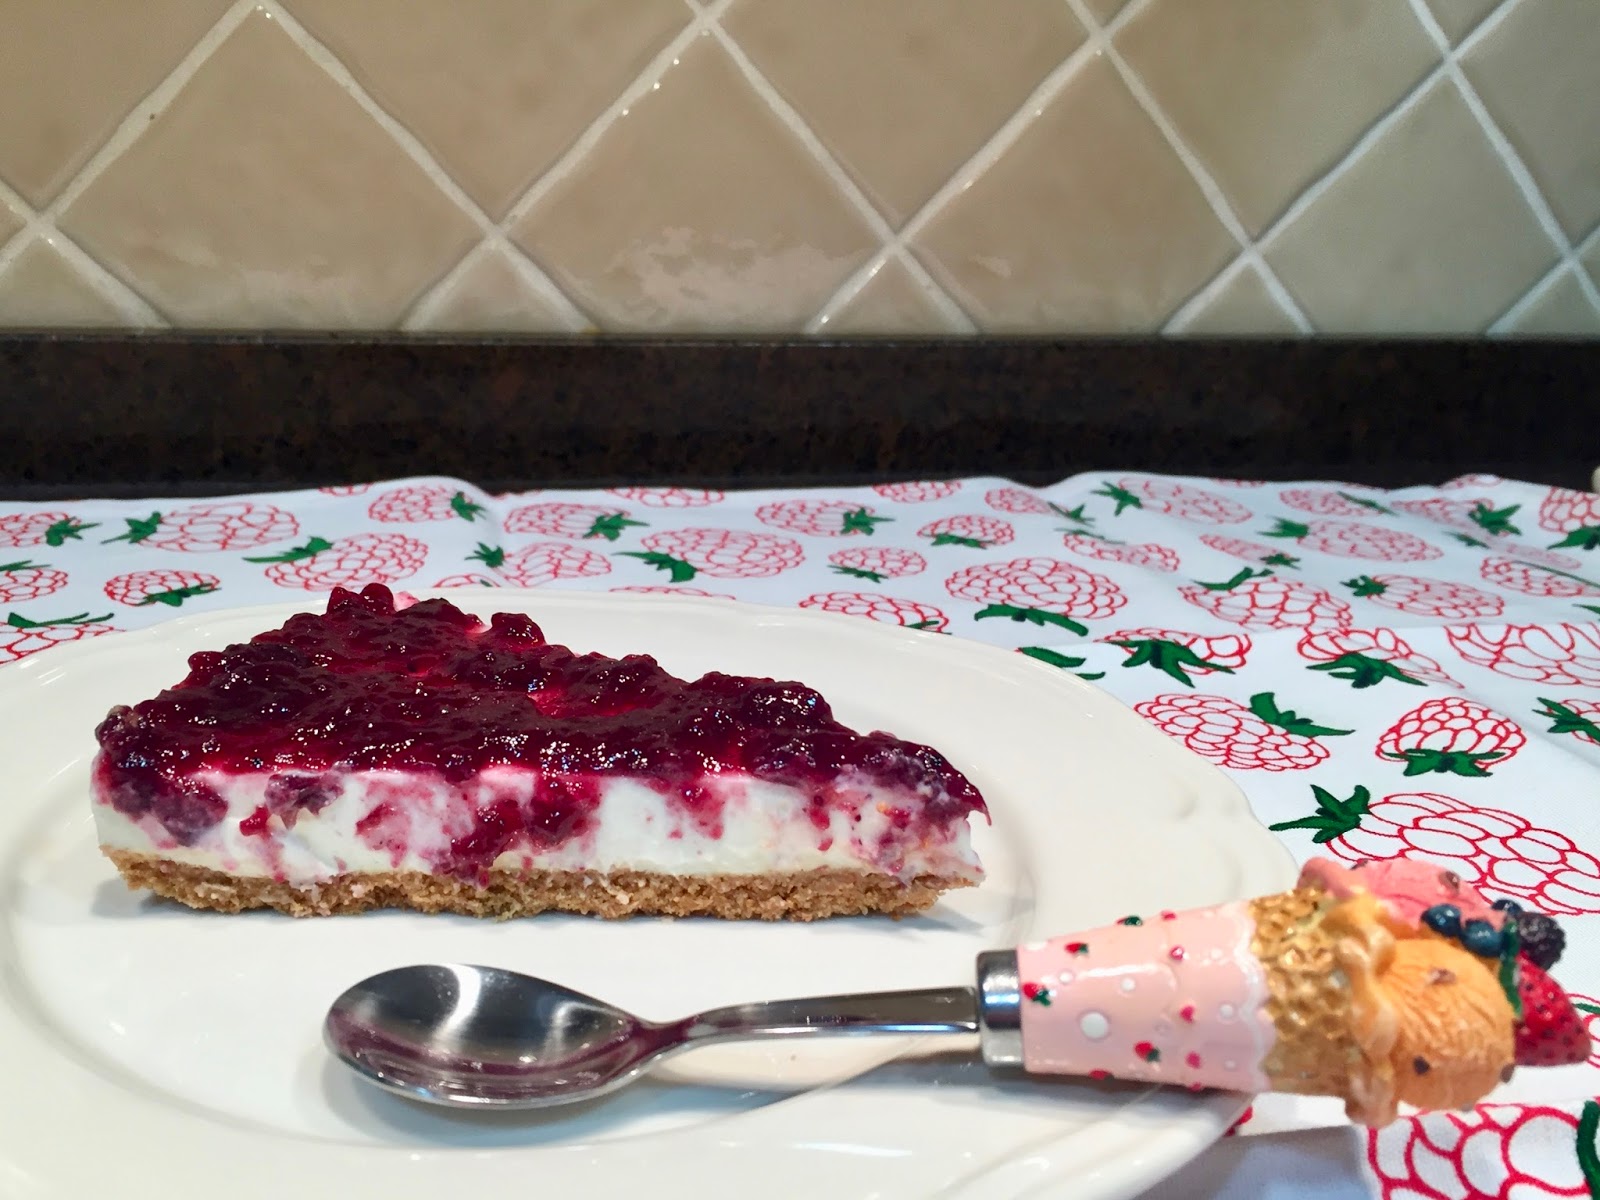
TARTA DE QUESO (sin huevo)


Aunque en mi casa no solemos celebrar el día de San Valentín, este año quise preparar una tarta de queso para mi "cómplice" en la vida, como sorpresa en el "día oficial de los enamorados", ya que éste es uno de sus postres favoritos (y el pobre llevaba siglos pidiendo que le hiciera una).

Pensaba que me faltarían los utensilios necesarios para preparar una, pero con esta fácil receta no se necesitan ni molinillo, ni varillas eléctricas, ni microondas, ni horno.


Ingredientes
- 25-30 galletas
- 60 g de mantequilla (sin sal)
- 400 g queso crema (aproximadamente. 1 tarrina y media de Philadelphia) 
- 400 ml de nata para montar (35% de materia grasa)
- 80 g de azúcar
- 4 láminas de gelatina neutra
- Mermelada de arándanos

1. Base de galletas 
Con ayuda de un mortero vamos machacando las galletas, hasta que parezca arena. En un cazo, derretimos la mantequilla a fuego lento; y después la agregamos a nuestras galletas, removiendo bien, hasta que parezca una especie de pasta.
En un molde (previamente forrado con papel vegetal), vamos compactando la mezcla anterior con ayuda de una cuchara, para formar la base de nuestra tarta. Una vez lista, la reservamos en el frigorífico.

2. Crema
A continuación, ponemos en remojo las hojas de gelatina. Mientras, echamos en un cazo el queso crema, el azúcar y la nata, y calentamos todos los ingredientes a fuego medio-bajo con el fin de que el azúcar se disuelva y la mezcla quede bien integrada (aproximadamente. 10-12, sin dejar de remover). En caso de que queden algunos grumos del queso sin fundir, podemos colar nuestra mezcla.
Una vez fuera del fuego, añadimos las hojas de gelatina (previamente escurridas) y removemos bien nuestra crema.

3. "Al frigorífico"
Vertemos la mezcla sobre nuestra base de galletas, y dejamos que se enfríe a temperatura ambiente antes de dejar que repose y cuaje en el frigo durante unas 6-8 horas (aunque mi recomendación es hacerla de un día para otro).

4. Decoración
Antes de desmoldarla, añadimos la mermelada que más nos guste. En este caso, utilicé mermelada de arándanos (pero antes de untarla sobre la tarta, es mejor removerla en un pequeño bol para que así esté un poco menos pastosa y cueste menos trabajo). Sin lugar a dudas, ¡repetiré pronto la receta!

NOTA: El molde utilizado tiene unos 26 cm de diámetro, por eso la tarta parece "bajita". Por otro lado,  se desmoldó sin problemas.

¡EXITAZO TOTAL!

************************

We don't usually celebrate Valentine's Day at home, but this year I wanted to surprise my fiancé, so I decided to make a cheesecake for him because it is one of his favourite dessert (and he had been asking me to make one for several years). 

I thought I wouldn't have all necessary cooking utensils to prepare one, although with this recipe you don't need special gadgets (no food processor, no wire whisk, no microwave, no oven).


Ingredients
- 25- 30 biscuits
- 60 g butter (without salt)
- 400 g cream cheese (one bowl and half of Philadelphia)
- 400 ml cream (to whip, with 35% fat)
- 80 g sugar
- 4 sheets of unflavoured gelatin
- Blueberry jam

1. Biscuit base
Crush the biscuits in a mortar until obtaining fine crumbs. Melt the butter in a saucepan on low heat. Then, mix the melted butter and the biscuits in order to form a paste that will be the base of the cake.
Line a cake tin with greaseproof paper, and place the prepared mixture pressing it down firmly with the back of a spoon. Once it is ready, place it in the fridge.

2. Cream
First, soak gelatin sheets in cold water. Meanwhile, in a medium saucepan pour the cream cheese, the sugar and the cream, stir and cook this blend on a medium-low heat until the ingredients are well combined (approximately for about 10-12 minutes). Once the cream is ready, if there would be any clump of cheese without melting, we can strain the mixture.
Remove from the heat. Then, squeeze the gelatin sheets, and add them to the cream and stir well.

3. "To the fridge"
Pour the cream over the biscuit base, and let cool at room temperature before chilling in the fridge for about 6-8 hours (although I recommend to make the cheesecake one day before).

4. Decoration
Before removing from the mould, spread our favourite jam. I used blueberry jam (but first, it's a good idea to stir it in a separate bowl in order to make this task easier). I have no doubt that I will make it again!

NOTE: My mould is 26 cm in diameter, for this reason the cheesecake seems low. On the other hand, it was very easy to remove it from the cake tin.

WHAT A SUCCESS!

GuardarGuardar
GuardarGuardar
GuardarGuardarGuardarGuardar

martes, 6 de junio de 2017

BIZCOCHO DE NARANJA (sin huevo ni leche)


Ingredientes
- 250 ml de zumo de naranja
- 125 g de azúcar
- 75 ml de aceite de girasol
- 225 g de harina de repostería
- 1 cucharada de levadura para repostería
- 1 cucharadita de bicarbonato
- Azúcar glas y canela (opcional)

1. Mezclas 
Con ayuda de la batidora de mano, mezclamos el zumo de naranja, el azúcar y el aceite de girasol (mezcla húmeda). A continuación, ponemos en un bol la harina, la levadura y el bicarbonato, y después los tamizamos (con ayuda de un colador) sobre nuestra mezcla húmeda; vamos batiendo con una varilla manual para que se integren todos los elementos.

2. Horneado
Vertemos la mezcla en un molde de horno alargado, que previamente habremos forrado con papel vegetal (esto nos ayudará a la hora del desmolde). La temperatura de horneado será de 170ºC, y habrá que dejarlo durante aproximadamente 40 minutos (pero puedes comprobarlo pinchando el centro del  pastel con una varilla, y viendo si sale seco o no). No olvides dejar que se enfríe. ¡¡¡Bizcocho rápido y fácil de hacer, a la par que delicioso!!!

3. Decoración (opcional)
Se puede decorar con un poco de azúcar glas y canela por encima.

************************

Ingredients
- 250 ml orange juice
- 125 g sugar
- 75 ml sunflower oil
- 225 g cake flour
- 1 spoonful of baking yeast
- 1 teaspoonful of bicarbonate
- Icing sugar & cinnamon (optional)

1. Blends
Mix these ingredients with the hand blender to obtain the wet blend: orange juice + sugar + sunflower oil. Then, put in a bowl the dry ingredients: cake flour + baking yeast + bicarbonate, and sift all of them (with a sieve) over the wet blend, stirring with a whisk until obtaining an homogeneous dough.

2. Baking
Cover a long baking tin with greaseproof paper, and pour the cake dough in it. Bake it in the preheated oven at 170 ºC for about 40 minutes (verify the proper cooking with the help of a stick). Don't forget to allow it to reach the room temperature before eating it. The result is a fast and easy sponge cake to make!!!

3. Decoration (optional)
You can sprinkle with icing sugar and cinnamon before eating it.

viernes, 3 de marzo de 2017

PASTEL DE ZANAHORIAS VEGANO


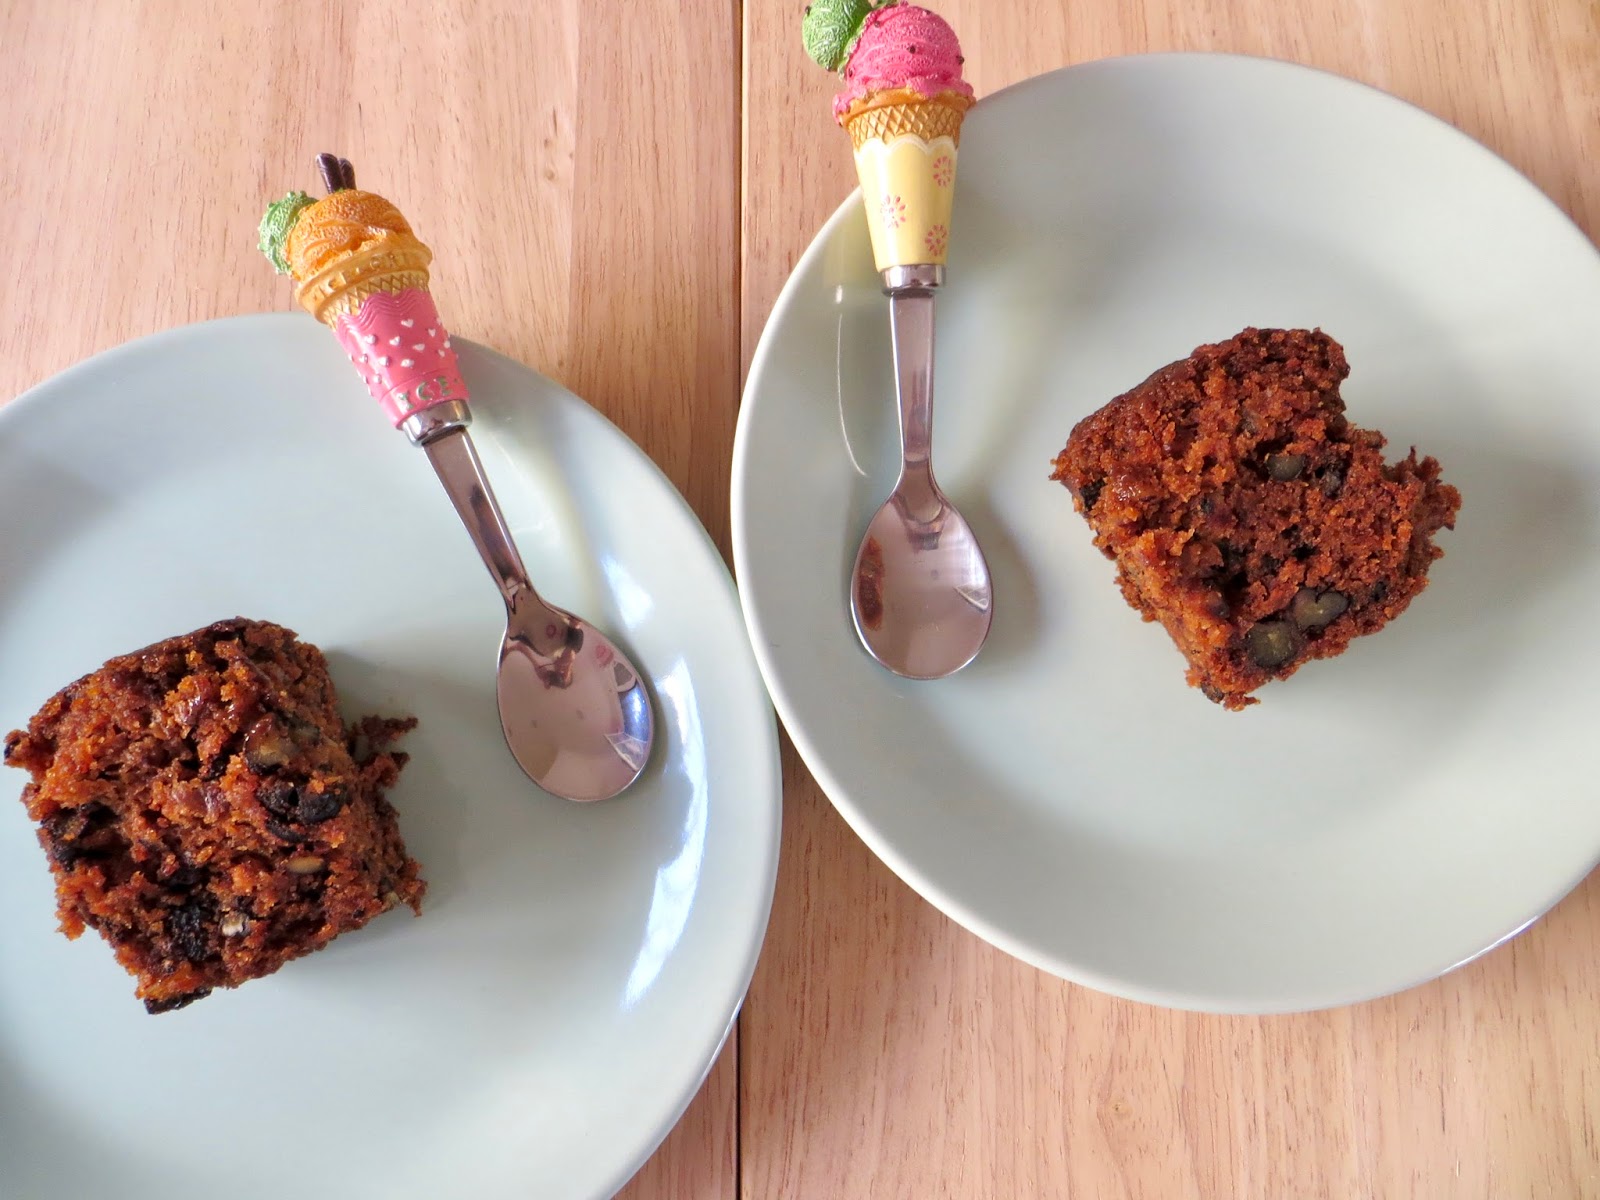
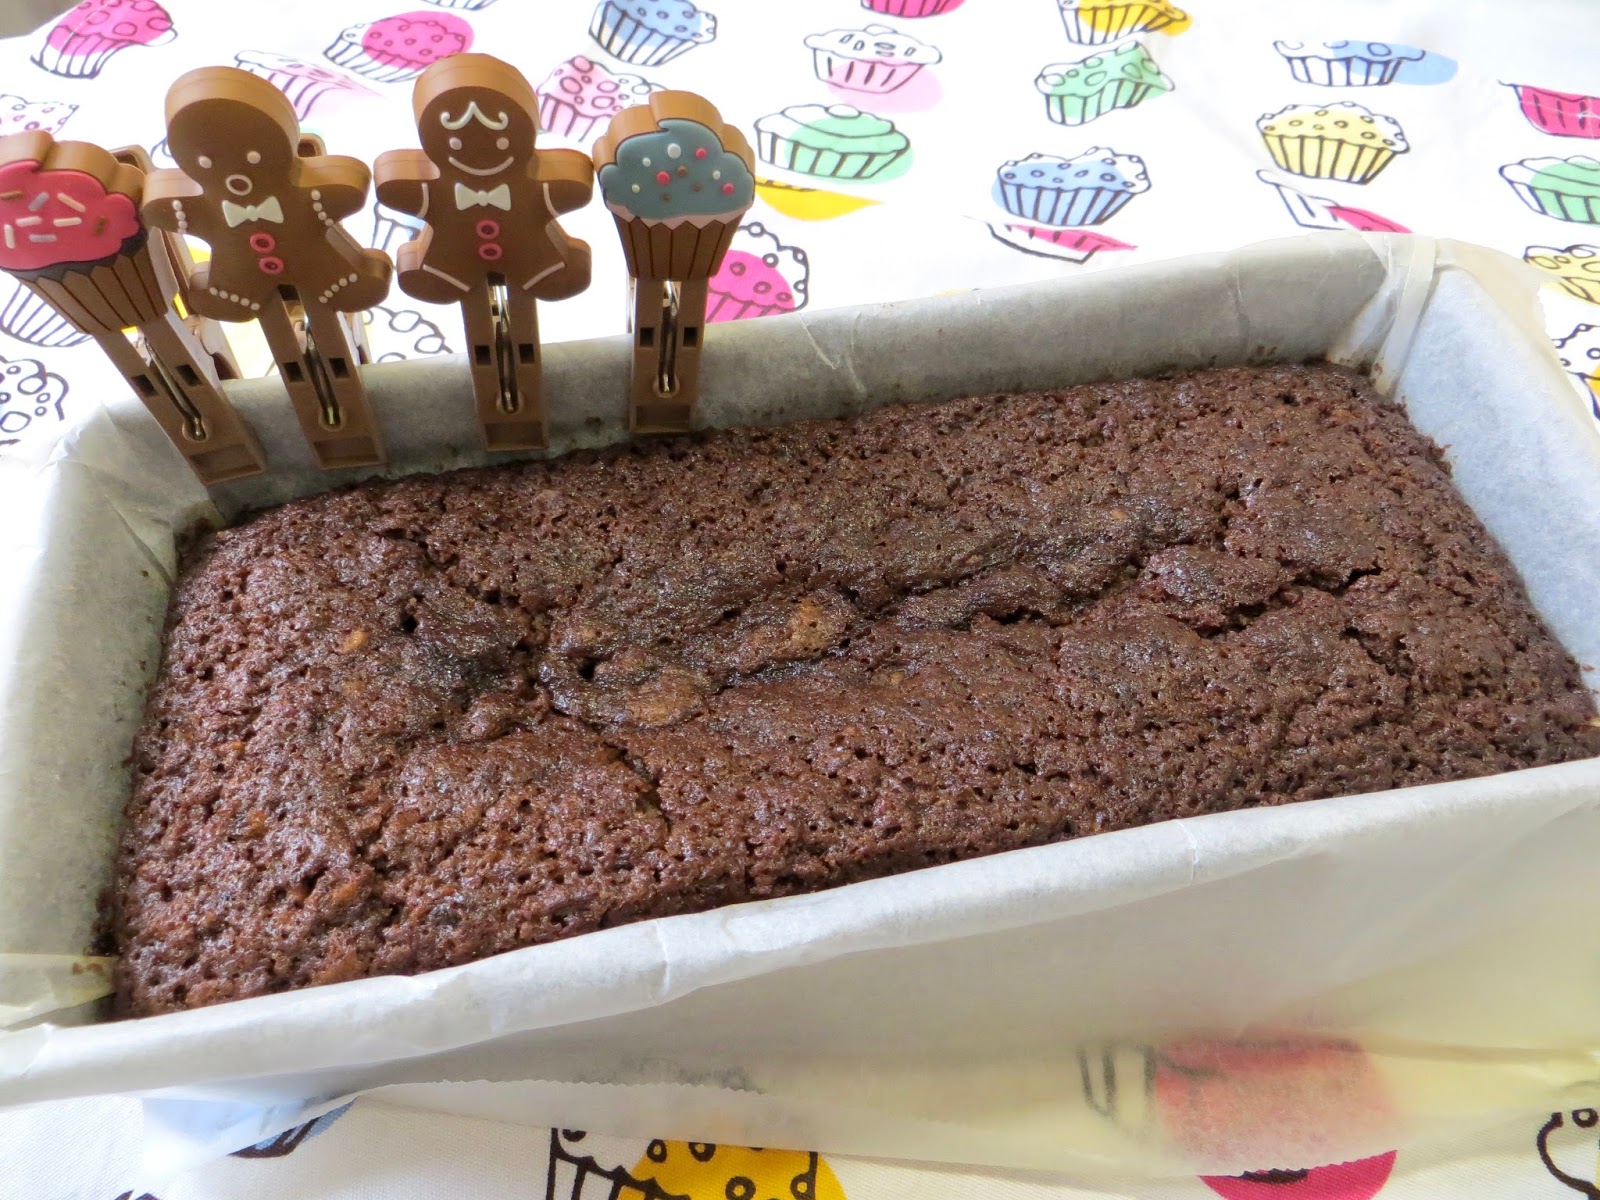
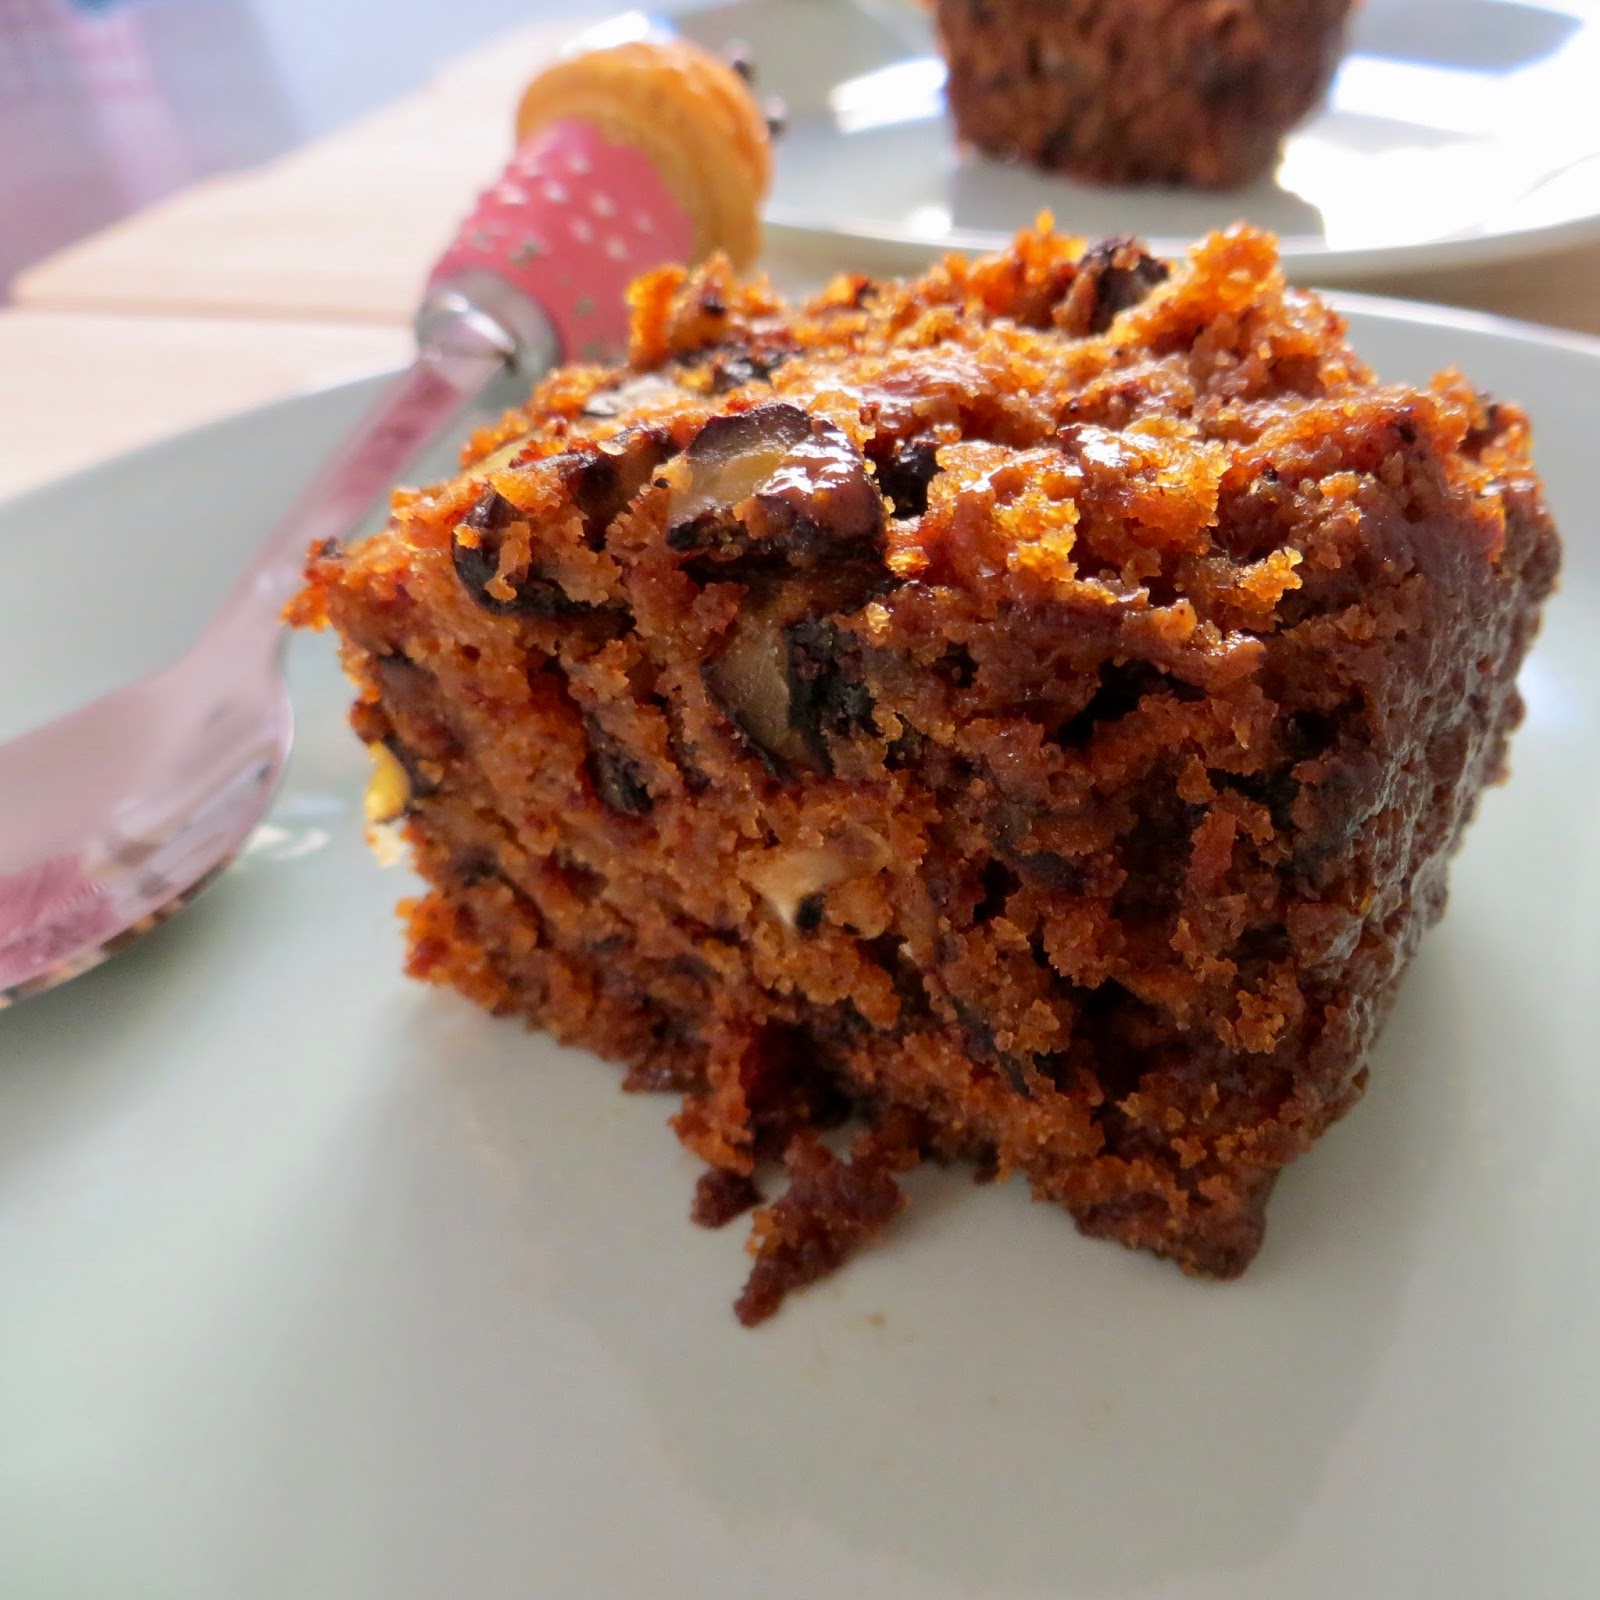
Tenía infinitas ganas de cocinar un pastel de zanahorias (sin huevo, claro), pero después de probarlo en "JULIA BAKERY" me decidí a prepararlo en mi cocina-laboratorio. Os enseño las fotos tanto de los preparativos como del resultado final.


Ingredientes
- 300 g de harina de repostería (ver NOTA)
- 270 g de azúcar moreno
- 1 cucharadita de sal
- 1 cucharadita de canela
- 1 cucharada de bicarbonato
- 1 cucharada de levadura para repostería
- 300 g de zanahorias
- 130 g de nueces
- 200 ml de agua
- 180 ml de aceite de girasol
- 1 cucharada de esencia de vainilla

NOTA: La receta original decía que se usara harina integral de trigo.

1. Mezcla seca
Mezclamos todos los ingredientes secos: harina + azúcar moreno + sal + canela + bicarbonato. Después los tamizamos (con ayuda de un colador) a un recipiente más grande.

2. Sólidos
Pelamos y rallamos las zanahorias (para ello, yo usé mi mandolina de cocina); partimos y cortamos las nueces en trocitos pequeños.

3. Mezcla húmeda
Mezclamos en otro bol los ingredientes húmedos: agua + aceite de girasol + esencia de vainilla. A continuación, vamos incorporándola a la mezcla de los ingredientes secos, batiéndola con una varilla para que se integren todos los elementos. Por último, agregamos las zanahorias y las nueces y lo mezclamos todo hasta que la masa sea homogénea.

4. Horneado
Vertemos la mezcla en un molde de horno alargado, que previamente habremos forrado con papel vegetal (esto nos ayudará a la hora del desmolde). La temperatura de horneado será de 180ºC, y habrá que dejarlo durante aproximadamente 1 hora (pero puedes comprobarlo pinchando el centro del  pastel con una varilla, y viendo si sale seco o no).
Deja que se atempere antes de hincarle el diente, y si eres capaz de resistirte a la tentación de probarlo, de un día para otro está casi mejor. ¡¡¡Rico, Tierno y Jugoso!!!

5. Decoración (opcional)
Aunque en mi caso tomamos el pastel así directamente (sin dejar ni una migaja), podría haberlo decorado bien con un poco de azúcar glas por encima, o una glasa de naranja, o bien con un frosting de crema de queso.

6. Glasa de naranja (receta)
* Necesitamos:

- 100 ml de zumo de naranja
- 250 g de azúcar glas

Se mezcla muy bien el azúcar con el zumo de naranja y se pinta el pastel, con lo que se le añade un toque cítrico, a la vez que dulce.


************************

I looked forward to cooking a carrot cake (eggs free), but when I tasted in
 "JULIA BAKERY", I decided to make it in my laboratory-kitchen. Here, I showed the pictures I took while I was preparing all the ingredients and the final result.

Ingredients
- 300 g cake flour (read NOTE)
- 270 g brown sugar
- 1 teaspoonful of salt
- 1 teaspoonful of cinnamon
- 1 spoonful of bicarbonate
- 1 spoonful of baking yeast
- 300 g carrots
- 130 g nuts
- 200 ml water
- 180 ml sunflower oil
- 1 spoonful of vanilla extract

NOTE: The original recipe said that we'd use wheat wholemeal.

1. Dry blend
Mix all the dry ingredients: cake flour + brown sugar + salt + cinnamon + bicarbonate. Then, sift all of them (with a sieve) to another and bigger bowl.

2. Solids
Finely grate the peeled carrots (I used my mandolin); break open the nuts and cut them in small pieces.

3. Wet blend
Mix in a vase the wet ingredients: water + sunflower oil + vanilla extract. Next, add it little by little to the dry blend, stirring with a whisk until well mixed. Lastly, add the carrots and nuts, stirring again until obtaining an homogenous blend.

4. Baking
Cover a long baking tin with greaseproof paper, and pour the cake dough in it. Bake it in the preheated oven at 180 ºC for about 1 hour (verify the proper cooking with the help of a stick).
Allow it to reach the room temperature before eating it. If it'd be possible, taste it the next day. The result is a tasty, soft and juicy cake!!!

5. Decoration (optional)
Although in my case, we had the cake with no frosting on top (and it disappeared, anyway), I could have sprinkled with icing sugar, or maybe I could have made an orange glaze, or even a cheese frosting.

6. Orange glaze (recipe)
* We need:

- 100 ml of orange juice
- 250 g of icing sugar

Mix icing sugar and orange juice properly, and then paint the cake. This glaze adds a touch of citrus as well as sweet.

martes, 17 de enero de 2017

CUPCAKES casi VEGANOS (sin azúcar ni huevo)


Ingredientes (para 12 cupcakes)
Leche
- Vinagre de manzana
- Sirope de ágave
Aceite de girasol
Extracto de vainilla
Harina para repostería
Levadura para repostería
Bicarbonato
- Sal 
- Queso de untar (para el "frosting")

1. Suero de mantequilla o buttermilk
Mezcla en un bol 150 ml de leche y 1 cucharada de vinagre de manzana, y después déjala reposar unos 10-15 minutos a temperatura ambiente, hasta que adquiera la apariencia de leche cortada. Este suero ayudará a que nuestros bizcochos queden tiernos y esponjosos (cosa totalmente necesaria al prescindir de los huevos en nuestra receta).

2. Mezcla húmeda
A continuación, añade sobre la mezcla anterior: 120 ml de sirope de ágave, 80 ml de aceite de girasol y 2 cucharadas de extracto de vainilla, y batimos con la varilla manual hasta que quede un líquido homogéneo.

3. Mezcla seca 
Por último, incorpora los ingredientes secos (tamizándolos para que queden bien repartidos y no se formen grumos): 160 g de harina, 3/4 de cucharada de levadura, 1/2 cucharada de bicarbonato, y 1/4 de cucharada de sal, y bátelo todo hasta que la masa quede homogénea.

4. Horneado
Reparte la masa sobre una bandeja de horno para magdalenas en sus correspondientes moldes (han salido justo 12 cupcakes con las cantidades utilizadas), y hornéalas a una temperatura de 180ºC durante unos 20-25 minutos; puedes verificar si la cocción es adecuada, pinchando el centro con una brocheta y si sale limpia (¡ya están listas!). Una vez fuera del horno, déjalas enfriar antes de añadirle el frosting.

5. Crema de queso
Mezclar bien unos 500 g de queso de untar con 5 cucharadas de sirope de ágape hasta obtener una mezcla consistente y podamos usar la manga pastelera. ¡Decorar y devorar! 

NOTA: En caso de que queráis que el frosting se endurezca un poco, meted los cupcakes en la nevera, aunque tened en cuenta que si lo dejáis mucho tiempo el bizcocho puede secarse.

************************

Ingredients (12 cupcakes)
- Milk
- Apple vinegar
- Agave syrup
- Sunflower oil
- Vanilla extract
- Cake flour
- Baking yeast
- Bicarbonate
- Salt
- Spreadable cheese (to make the frosting)

1. Buttermilk
Blend in a bowl 150 ml of milk and a spoonful of apple vinegar, wait for for about 10-15 minutes at room temperature until it seems like sour milk. In this way, the buttermilk help us to make sponge cakes softer (since we are not going to use eggs).

2. Wet blend
Now, pour over the buttermilk the next ingredients: 120 ml of agave syrup, 80 ml of sunflower oil and 2 spoonful of vanilla extract; then, stir with a whisk until obtaining an homogeneous wet blend.

3. Dry blend
Lastly, add the dry ingredients (keep in mind you should sift these ingredients for avoiding that clots are formed): 160 g of cake flour, 3/4 of spoonful of baking yeast, 1/2 spoonful of bicarbonate and 1/4 of spoonful of salt; stir again with the whisk until the dough is homogenous.

4. Baking
Use paper baking cups on a muffin tray and pour the dough (with these proportions we can make 12 units) in order to bake them in the preheated oven at 180ºC for about 20 o 25 minutes (verify the proper cooking with the help of a stick). Let cool to room temperature before adding the frosting.

5. Cheese frosting
Mix perfectly 500 g of spreadable cheese and 5 spoonful of agave syrup. When the cream is ready to use the pastry sleeve, decorate the muffins and devour them!

NOTE: Save the cupcakes in the fridge, if you want the frosting gets hardened a little.

GuardarGuardar

lunes, 7 de noviembre de 2016

TRENZA DE CHOCOLATE

En mi casa, un día sí y otro también, se nos hace la boca agua viendo alguno de los videos de TASTEMADE, que a través de distintas plataformas y dispositivos ofrece recetas muy inspiradoras y algunas son muy fáciles de hacer. Este es el caso de la trenza de chocolate: mi goloso "Project Manager" vio el video poco antes de su cumpleaños y me pidió que se la hiciera. Aunque el enlace de la receta original podéis verlo aquí, mi sub-chef rubia favorita y yo la preparamos sin huevo (por temas de alergia) y el resultado es igual de apetecible.


Ingredientes
- Hojaldre
- Tableta de chocolate
- Almendras fileteadas
- Almendras crocanti

1. Coloca, corta, trenza y adorna
Pon la tableta de chocolate (ver NOTA) en el centro de la masa de hojaldre; después haz cortes a la masa (por el lado más largo de la tableta) y ve trenzando las tiras de masa con el objetivo de cubrir todo el chocolate. Añade tu aderezo favorito, que en nuestro caso fueron almendras crocanti y fileteadas.

2. Hornea
Pon la trenza en el horno precalentado a 200ºC durante unos 20-25 minutos, hasta que el hojaldre se dore. Puedes tomarla tibia o fría, pero en cualquier caso es un postre fácil de hacer y delicioso.

NOTA: Los más golosos pueden utilizar chocolate con leche (para mí, sale un poco empalagosa), y quienes prefieran los dulces no muy dulces pueden usar chocolate negro (así me gusta más). Si utilizáis otro tipo de chocolate (blanco, con avellanas, relleno de trufa, ...), contadme qué tal sale.
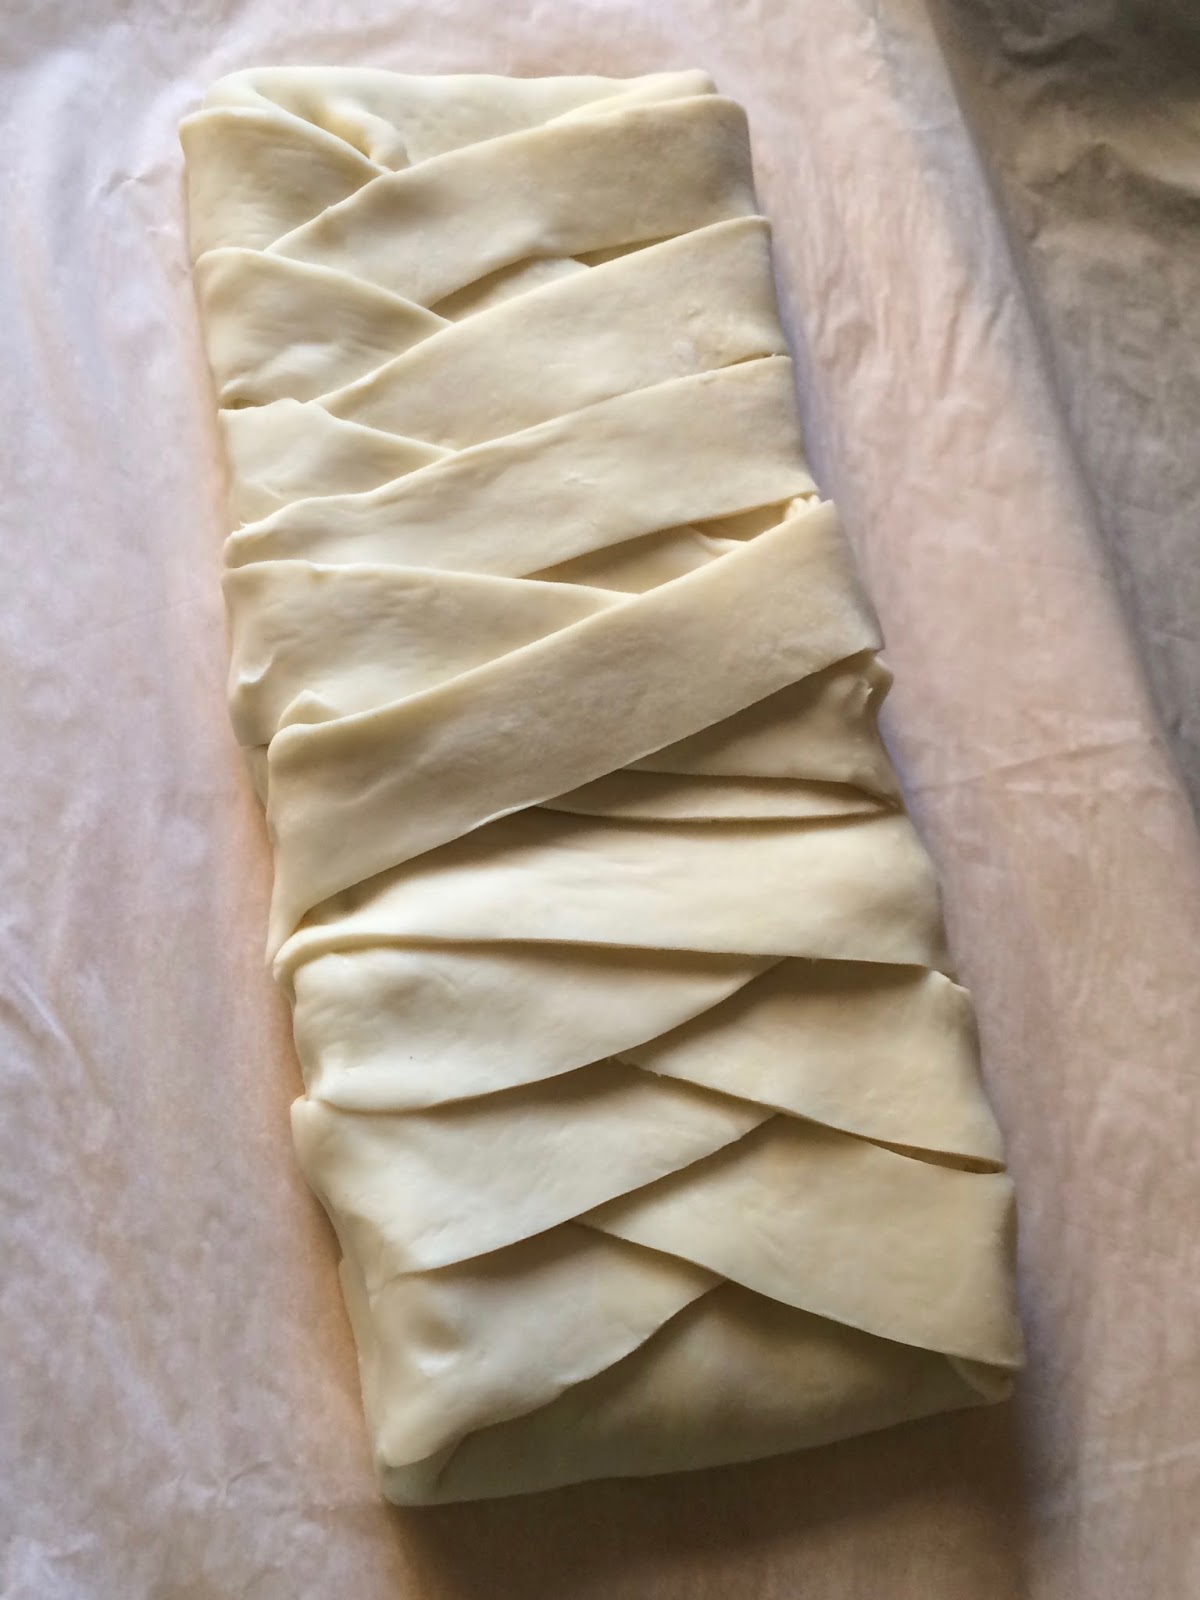
************************

TASTEMADE offers us a lot of inspiring recipes and some of them are very easy to make, for this reason our mouths begin to water while we are watching these short cooking videos at home on day in and day out. This is the case of the chocolate braid: my gourmand "Project Manager" watched the video a few days before his birthday and asked me to make it. Although the original video is here, my blonde favourite sub-chef and me made the braid egg free (I am allergic) and the result was very similar. 

Ingredients
- Pastry sheet
- Chocolate bar
- Silvered almonds
- Crunched almonds

1. Put, cut, braid and decorate
Put the chocolate bar on the centre of pastry sheet; after that, cut both longer sides and begin to braid the stripes of the pastry in order to cover the chocolate. Then, add your favourite topping, that in this case, were silvered almonds and crunched almonds.

2. Bake
Bake the dessert in a oven preheated at 200ºC for 20-25 minutes, until the pastry sheet is brown. You can have warm or cold, but it is always an easy to make and delicious dessert.

NOTE: Greedy people can use milk chocolate (although I think the result is a little cloying). So, not so gourmand people can use dark chocolate (this is my favourite). But, if you dare to use another kind of chocolate (white chocolate, with hazelnuts, truffle filling, ...), tell me how is the result, please.

sábado, 1 de agosto de 2015

SORBETE DE SANDÍA


Para combatir el calor que está haciendo estos días, no hay nada mejor que tomarte un buen y refrescante sorbete. El mejor escenario para disfrutar de él es quedarse en casa, con las persianas echadas, un poco de aire acondicionado, ... y NADA de terrazas, que sí, que sí, lo prometo; y es que los que seáis de Málaga comprenderéis de qué estoy hablando: EL TEMIDO TERRAL. Os dejo algunas expresiones que pueden escucharse en las calles de mi ciudad estos días:

"Hoy hace terral", "En la calle cae fuego", "No se puede ni respirar", .... y mi favorita (la más castiza) "NOOOVE QUÉ CALÓ, VIEO" (que podría transcribirse al castellano como: "No veas qué calor, viejo" sin que tengamos que referirnos a personas ancianas). ¡Que no, no somos exageraos, ni ná! (es un mito).


Ingredientes
- Fresas                  (6 - 8 uds., dependiendo del tamaño)
Sandía (fría)         (600 g)
- Menta fresca        (5 hojas)
- Zumo de lima
- Cubitos de hielo     (4 uds.)

NOTA: Con estas cantidades salen aproximadamente 2 buenas raciones de sorbete.


1. ¡Batidora, a tope!
Cortar las fresas y la sandía para facilitarle el trabajo a la batidora. Lavar bien las hojas de menta. Añadir a la batidora todos los ingredientes (fresas, sandía, hojas de menta y zumo de lima). Batir hasta que quede homogéneo. Por último, agrega los cubitos de hielo y vuelve a batir. Guárdalo en la nevera si no lo vas a consumir en el momento porque lo mejor es tomarlo bien frío.

************************

To beat the heat these days, the best way is to drink a proper and refreshing sorbet. And the best place to have it is to stay at home, with closed blinds and windows, switched on air conditioner, .... and without going out if it isn't strictly necessary. If you are from Malaga, you will know what I am talking about: THE FEARED "TERRAL" (a typical wind that came from the land). I am going to translate literally some of the expressions you could heard in the streets of my city on these days:

"Today, it is terral", "In the street, fire is coming down", ... and my favourite (so authentic in my language): "You may not see what heat, old man". In Malaga, we aren't usually exaggerated, it's only a myth!


Ingredients
- Strawberries                 (6 - 8 pieces, depending on the sizes)
- Watermelon (chilled)      (600 g)
- Fresh mint                    (5 leaves)
- Lime juice
- Ice cubes                       (4 cubes)

NOTE: With these quantities of ingredients I made about 2 large glasses of sorbet.


1. Mixer to work!
Cut into pieces both fruit (strawberries and watermelon). Wash properly the mint leaves. Add to the mixer all the ingredients (strawberries, watermelon, mint leaves and lime juice) and blend them together until the mixture is homogeneous. Finally, add ice cubes and blend again. Keep in the fridge if you are not going to taste it immediately, so that, sorbet gets cold enough to drink. 


domingo, 21 de junio de 2015

TARTA DE GALLETAS PARA CUMPLEAÑOS


Cuando mi cuñada me dijo si había hecho alguna vez una tarta de galletas, no dudé ni un segundo en decirle que aunque hacía años que no las hacía (de niña ayudaba algunas veces a mi madre a prepararlas), intentaría que la tarta para el cumpleaños de mi sobrina saliera lo mejor posible. Así, después de consultar a mis asesoras culinarias (madre y tía repostera -Los Sabores de Ana-) y siguiendo mi propia intuición, preparé una tarta que quedó deliciosa además de bonita.


Ingredientes
- Galletas cuadradas
- Leche entera
- Chocolate (para hacer a la taza)
- Canela molida
- Decoración para ponerla bonita: fideos de colores, mininubes, velas de colores, banderín "Happy Birthday".

NOTA: Las cantidades totales de los ingredientes quedan resumidas en la primera imagen, teniendo en cuanta que la tarta resultó ser de unos 20 cm x 26 cm.


1. ¡Chocolate!
Para preparar el chocolate, lo mejor es seguir las instrucciones que nos proporcione el paquete, pero duplicando la cantidad de chocolate que nos indiquen para que así salga más espeso. En mi caso concreto, preparé el chocolate en dos veces (porque no sabía lo que iba a necesitar), y en cada una de estas veces, utilicé medio litro de leche tibia en los fui disolviendo unas 18 pastillas de chocolate, removiendo continuamente la mezcla a fuego lento sin dejar que llegara a hervir. Después, lo dejé enfriar un poco antes de ponerlo sobre las galletas.

2. Galletas y montaje
En un vaso de leche añadimos un par de cucharaditas de canela, y batimos lo mejor posible para no dejar grumitos. Y ya está todo listo para empezar a montar la tarta. Sólo hay que mojar cada una de las galletas en el vaso de leche con canela (sin dejar que se empapen demasiado), e ir colocándolas sobre una bandeja. Cuando la primera capa de galletas queda lista, aplicamos una capa generosa de chocolate, y volvemos a repetir estos dos pasos hasta conseguir la altura que queremos. Cuando hayamos terminado, sólo hay que cubrir los lados de la tarta con más chocolate, y dejamos que se enfríe en la nevera.

3. ¡A decorar!
La decoración es mejor dejarla hasta momentos antes en que vayamos a tomar la tarta (justo antes de soplar las velitas), para que así quede más vistosa y con colores más vivos. En este caso, utilicé fideos de colores, nubecitas y un banderín de "Happy Birthday" que montamos nosotros, gracias a una plantilla de abecedario (tomada del blog "Yellow Bliss Road"), dos cordones, dos palillos de madera (de los que usamos para hacer brochetas), tijeras y pegamento.

¡¡TODOS ESPERAMOS QUE PASARAS UN GRAN DÍA!! ¡¡FELICIDADES, PRECIOSA!!


************************

When my sister-in-law asked me if I could make a no-cook biscuit and chocolate cake, I didn't hesitate for a second and I told her that I'd do anything to make it out delicious. Then, I was talking to my cooking advisers (my mum and my aunt, whose blog is called -Los Sabores de Ana-) in order to remember what ingredients I would need and all the steps to follow. The final result was a luscious and beautiful birthday cake.


Ingredients
- Square biscuits
- Whole milk
- Chocolate
- Ground cinnamon
- Decoration: coloured sugar, mini-marshmallows, birthday candles, little flags.

NOTE: To make a cake whose dimensions are 20 cm x 26 cm, as you can see in the first picture, we need:
36 squares of chocolate   +   1 litre of milk
120 square biscuits   +   1 glass of milk with cinnamon 


1. ¡Hot chocolate!
To make hot chocolate, you should follow the instructions, but doubling the amount of chocolate in order to get a less fluid chocolate. In my case, I used 18 squares of chocolate on half a litre of warm milk, and I repeated the operation twice (because I didn't know how much chocolate I was going to need). Once the chocolate is dissolved, we stir it constantly over low heat, and at least, let it cool down before building the cake.

2. Biscuits and preparation
Add two teaspoon of ground cinnamon in a glass of milk, and stir it until there are no lumps. Then, you only have to dunk the biscuits in the milk and place them on a tray. When the first layer is made, cover it generously with the chocolate, and repeat both steps about three times more. When you have finished, cover the four sides of our cake, and let it cool down into the fridge.

3. Time to decorate!
It is better to decorate the birthday cake just before blowing the candles, so that the colours are more vivid and the cake is more eye-catching. In this case, I added colored sugar, mini-marshmallows and little flags with the phrase "Happy Birthday" (whose template was taken from the blog "Yellow Bliss Road").

WE ALL HOPE YOU SPENT A GREAT DAY!! HAPPY BIRTHDAY TO YOU!!