sábado, 27 de julio de 2019

HUMMUS DE REMOLACHA


Ingredientes (para 2 personas) - 200 g de garbanzos cocidos
- 250 g de remolacha cocida
- 2 cucharadas de tahini (receta: aquí)
- 1 diente de ajo
- 1 cucharadita de sal
- Zumo de medio limón
- 2-3 cucharadas de aceite de oliva
- Pipas de calabaza (para decorar)

1. Hummus
Enjuagamos los garbanzos (de bote) debajo del grifo y los escurrimos con ayuda de un colador. En la batidora de brazo trituraemos, en primer lugar, el ajo con el tahini, la sal, el zumo de limón y el aceite de oliva. Una vez que estos ingredientes están mezclados, vamos añadiendo los garbanzos y la remolacha (en trocitos), y trituramos todo hasta que hayamos obtenido una mezcla homogénea y cremosa. Probamos y podemos rectificar la sal o el zumo de limón, como más nos guste.

2. Opcional
Podemos servirlo con unas pipas de calabaza y un chorrito de aceite de oliva. Está muy rico con pan de pita, regañás o bastoncitos de verduras.

************************

Ingredients (for 2 persons)
- 200 g boiled chickpeas
- 250 g boiled beetroot
- 2 spoonful of tahini (recipe: here)
- 1 garlic clove
- 1 teaspoon of salt
- 1/2 Lemon juice
- 2-3 spoonful of olive oil
- pumpkin seeds (decoration)

1. Hummus
Rinse the chickpeas under the water, and leave to drain. We need a hand blender in order to make it easier. First, put in the glass these ingredients: garlic clove, tahini, salt, lemon juice and olive oil, and blend them. Then, add (little by little) the chickpeas and the beetroot in cubes, in order to blend until we get our colourful puree.

2. Optional
To serve the hummus, put it in a bowl and decorate it with some pumpkin seeds and a dash of olive oil. It is delicious with any type of breadsticks, crackers or vegetable sticks.

lunes, 29 de octubre de 2018

PASTA AL PESTO DE RÚCULA Y PISTACHOS


Ingredientes (2 personas)
- Pasta (lacitos), 200 g
- Rúcula fresca, 30 g
- Pistachos pelados, 45 g
- Queso parmesano rallado, 35 g
- Diente de ajo
- Aceite de oliva
- Sal
- Pimienta

1. Pasta
Se cuece la pasta en abundante agua hirviendo con un poco de sal, pimienta en grano y una cucharadita de aceite. Cuando la pasta esté "al dente", la escurrimos y después la pasamos unos segundos bajo el grifo de agua fría  (para que quede suelta, y no se pegue).

2. Salsa pesto
Mientras se hace la pasta, preparamos la salsa pesto. En la batidora, añadimos la rúcula, los pistachos, el diente de ajo pelado y el queso parmesano rallado, y lo trituramos todo hasta obtener una crema homogénea. Como queda bastante espesa, agregamos un chorro generoso de aceite de oliva y un vasito del agua de cocción de la pasta y volvemos a triturar todo, de manera que obtenemos una salsa de consistencia más suave.

3. Rehoga y sirve
En una sartén, calentamos un poco de aceite y rehogamos la pasta junto con la salsa, para que se mezcle todo antes de servirla. Una vez en los platos, añadimos un poco de pimienta molida y unos pistachos extra para decorar. ¡Fácil y rico rico!

************************

Ingredients (2 persons)
- Pasta (little bows), 200 g
- Fresh rocket leaves, 30 g
- Pistachios, 45 g
- Grated Parmesan cheese, 35 g
- Garlic clove
- Olive oil
- Salt
- Ground pepper

1. Pasta
Boil water and put in a little salt, peppercorns and a spoonful of olive oil before adding pasta. Stir and check every now and then until it is "al dente". Strain, at the same time provide cold water from the tap to pasta for some seconds to avoid sticking. 

2. Pesto sauce
While pasta is been cooked, you can make the pesto sauce. Blend together rocket leaves, pistachios, garlic clove and Parmesan cheese, until obtaining an homogenous cream. To lighten this cream, we pour a good amount of olive oil and a glass of the cooking water (where the pasta has been boiled) and we blend the mixture again, in order to get a more creamy sauce.

3. Fry lightly & serve
Fry lightly in a frying pan pasta and pesto sauce, with a little of olive oil, mixing all the ingredients. Once served, season with ground pepper and decorate with extra pistachios. Easy and tasty tasty!

jueves, 9 de agosto de 2018

SOLOMILLO WELLINGTON


Ingredientes
- Solomillo de cerdo
- Cebollas frescas (2 ud.)
- Champiñones (300 g)
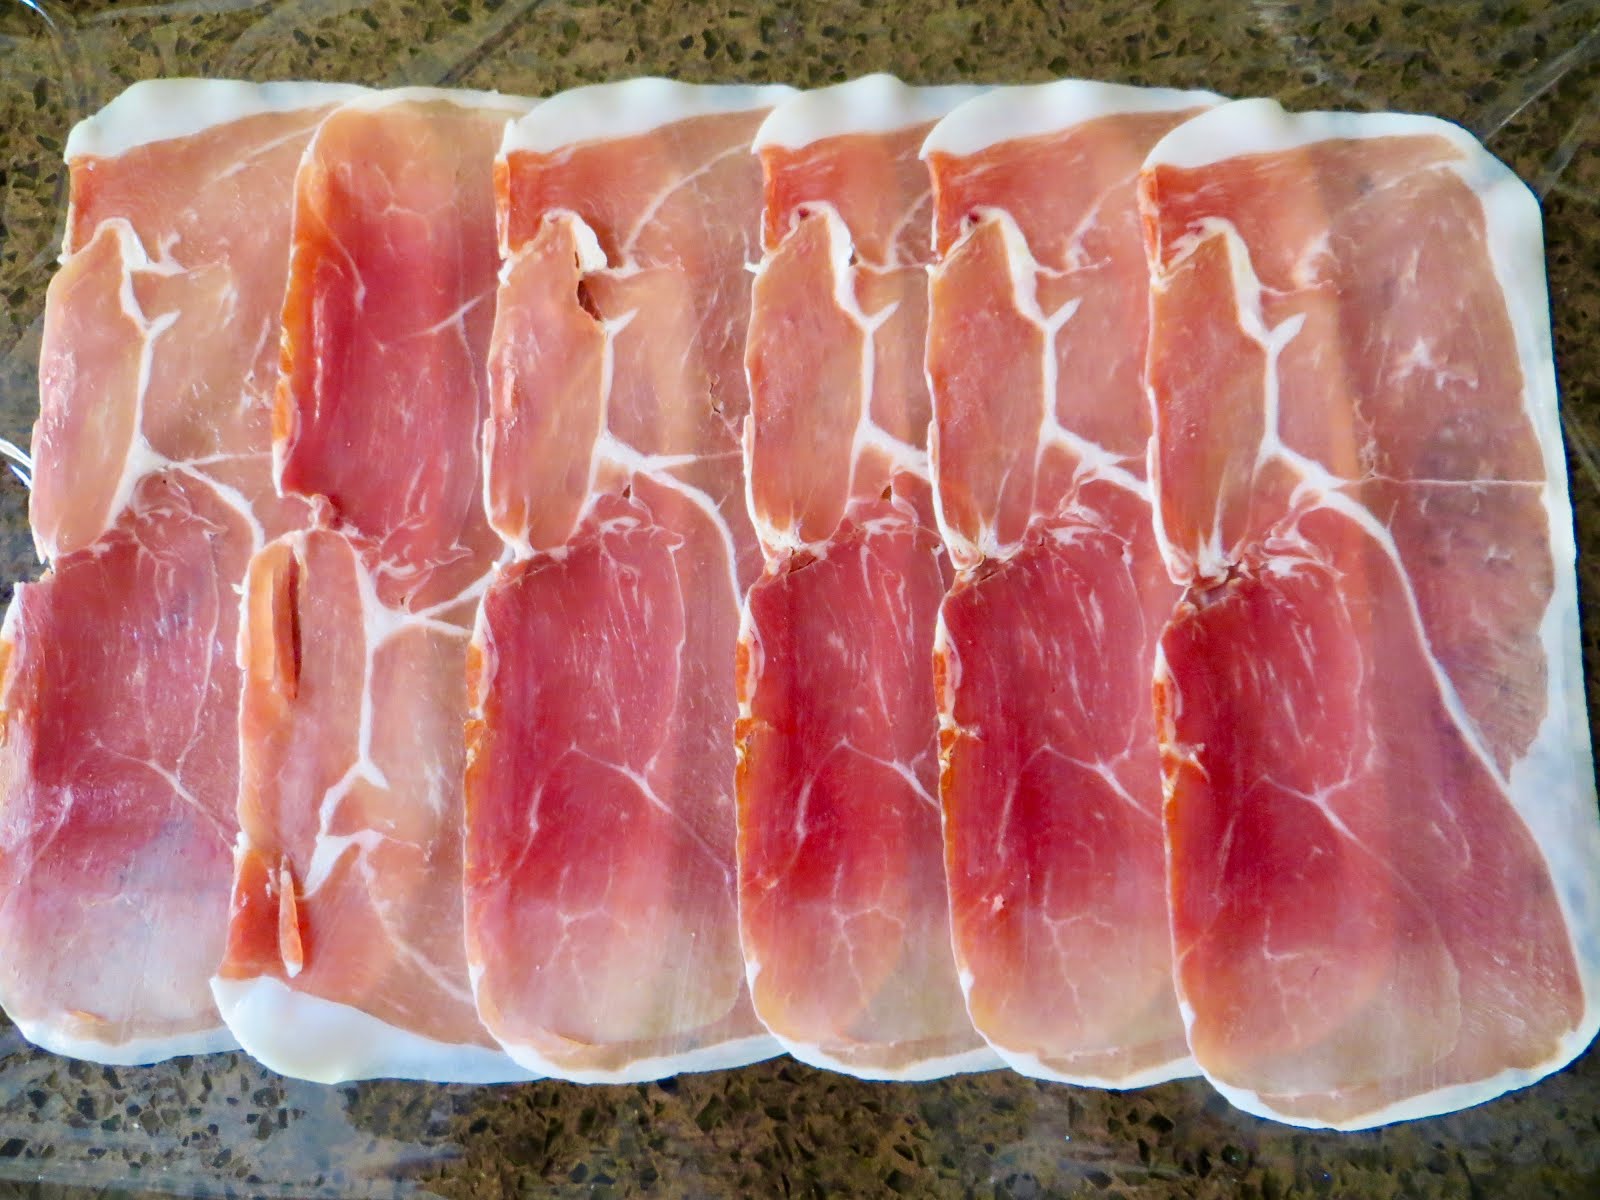
- Jamón serrano
- Paté (80 g)
- Masa de hojaldre
- Mostaza de Dijon
- Sal
- Pimienta
- Aceite de oliva

1. Sella el solomillo
Limpia el exceso de grasa del solomillo, y ponlo en una sartén con un poco de aceite para que se dore por todos lados y así sellar la carne. Después resérvala.

2. Prepara las verduras
Corta las cebollas y los champiñones en trocitos muy pequeños, y rehógalos en la misma sartén anterior con un poco de sal y pimienta. Una vez fuera del fuego, ponlo en un cuenco y añade el paté, removiendo todo hasta que parezca una pasta homogénea que hay que dejar enfriar.

3. Enrolla y hornea
Utiliza un poco de papel film y coloca encima las lonchas de jamón serrano, montando unas sobre otras (de forma que pueda cubrir todo el solomillo). Unta las lonchas con la pasta de cebollas, champiñones y paté. Coloca el solomillo encima, añadiéndole un poquito de mostaza. Después envuelve el solomillo con el jamón -con el film será mucho más fácil-, cuidando que quede totalmente cubierto por el jamón. Por último, estira la masa de hojaldre y lo envolvemos todo. Se calienta el horno a 180ºC, y se hornea durante unos 35-40 minutos, cuidando de que no se queme por fuera. Templado será más fácil de cortar. ¡Delicioso!

************************

Ingredients
Pork sirloin
- Fresh onions (2 u.)
- Mushrooms (300 g)
- Serrano ham
- Pate (80 g)
- Pastry dough
- Dijon mustard
- Salt
- Ground pepper
- Olive oil

1. Sear the sirloin
Clean off excess fat from pork sirloin, and then, use a fry pan with a little of olive oil to sear the meat. Reserve.

2. Prepare the vegetables
Cut onions and mushrooms into small dices, and sauté them into the same fry pan. Remove from the heat, put the vegetables into a bowl and add the pate, stirring everything to form a creamy paste. Then, let it cool down.

3. Wrap and cook in the oven
Stretch a piece of plastic wrap and place the slices of serrano ham, putting them on top of each other (to cover the sirloin completely). Spread the ham with the creamy paste (made of onions, mushrooms and pate). Place the pork sirloin on top, adding a little of Dijon mustard. Then, wrap the meat with the ham -with the plastic wrap it'll be easier-. Lastly, wrap it all the ingredients with the pastry dough. Cook in the oven preheated to 180ºC for about 35-40 minutes, but be careful and avoid burning. If you serve the Wellington sirloin at room temperature, it will be easier to cut it. Delicious!

miércoles, 1 de agosto de 2018

ENSALADA DE ESPELTA CON MANGO Y AGUACATE


Ingredientes
- Espelta
- Agua
- Mango
- Aguacate
- Zanahorias
- Tomates cherry
- Hojas de albahaca fresca
- Aceite de oliva
- Vinagre de Módena
- Sal
- Pimienta

1. Cocer la espelta
Se cuece la espelta siguiendo las indicaciones del paquete. En mi caso son las siguientes: 
- Hervir el doble de agua, añadir un poco de sal y cocer la espelta durante aproximadamente 15-20 minutos.
- Escurrir y dejar que se enfríe antes de mezclarlo con los demás ingredientes.

2. Frutas y verduras
Se cortan en dados todas los ingredientes: el mango, el aguacate, y los cherris y zanahorias en trocitos más pequeños, y los mezclamos con la espelta.

3. Aderezo
Para el aderezo mezclamos aceite de oliva, una cucharada de vinagre de Módena, sal y pimienta. Lo añadimos sobre nuestra ensalada y mezclamos todo. La dejamos en el frigorífico antes de servirla. Picamos unas hojas de albahaca por encima y... ¡hora de comer!

************************


Ingredients
- Spelt
- Water
- Mango 
- Avocado
- Carrots
- Cherry tomatoes
- Fresh basil leaves
- Olive oil
- Vinegar of Modena
- Salt
- Ground pepper

1. Cook the spelt
Follow the instructions to boil the spelt, that in my case were:
- Boil the double amount of water, add a little of salt and cook the spelt for about 15-20 minutes.
- Drain the spelt and let it cool down before mixing with the rest of ingredients.

2. Fruits and vegetables
Cut into cubes all the ingredients: mango, avocado, and cut into small dices cherries and carrots. Then, put them into a bowl, mixing all together with the spelt. 

3. Dressing
Mix olive oil, a spoonful of vinegar, salt and ground pepper. Add it over the before mixture, stir everything and set the salad in the refrigerator. Chop fresh basil leaves parsley, and... Mealtime!
GuardarGuardarGuardarGuardar

jueves, 12 de julio de 2018

SUSHI GRIEGO


Ingredientes
- Calabacín
- Hummus
- Tomates cherry
- Aceitunas kalamata
- Queso feta

1. Hacer las tiras
Se lava muy bien el calabacín y, sin pelarlo, cortamos tantas tiras transversales como piezas de sushi queramos hacer; para llevar a cabo este proceso, una mandolina de cocina nos puede ayudar, pero en este caso hemos utilizado un pelador de verduras bastante afilado. Recuerda secar un poco las tiras con papel de cocina.

2. Preparar el relleno
En un bol, se añaden todos los ingredientes (tomates, aceitunas y feta) cortados en trocitos pequeños y se mezclan; de esta forma será más práctico preparar nuestros "sushis".

3. Untar y enrollar
Se untan con humus cada una de las tiras de calabacín y se colocan los ingredientes encima. Sólo queda enrollarlas con un poco de gracia y ya está... ¡listos para comer!

NOTA: Si te gusta, se pueden aliñar con unas gotas de limón.

************************

Ingredients
- Cucumber
- Hummus
- Cherry tomatoes
- Kalamata olives
- Feta cheese

1. Slice
Thoroughly wash the cucumber, and slice it into thin flat strips (as many as you need to prepare the sushi pieces) using a kitchen mandolin or a sharp vegetable peeler. Remember to lay slices down on paper towels to drain excess moisture.

2. Make the filling
Cut into small dices all the ingredients (cherry tomatoes, kalamata olives and feta cheese), and put into a bowl, mixing them; it'll be easier to make our "sushis".

3. Spread and roll
Spread with hummus each cucumber slice, then sprinkled the mix of ingredients on top. It's time to tightly roll each cucumber slice. Ready to be eaten!!!

NOTE: You can squeeze fresh lemon juice on top, if using.

domingo, 1 de abril de 2018

MUTABAL (cocina libanesa) o BABA GHANUSH (cocina árabe)


Ingredientes
- 1 Berenjena
- 2 Dientes de ajo
- 1 Cucharadita de comino
- 1 Cucharada de tahini (pasta de sésamo)
- Zumo de limón
- Sal
- Pimienta
- Aceite de oliva
- Pimentón (opcional)

1. Rehogar
Pelamos y cortamos en dados la berenjena, y los dejamos en remojo unos 20 minutos con un poco de sal para evitar su amargor (escurre y cambia el agua, al menos una vez). Mientras, pela y machaca en un mortero los dientes de ajo junto con el comino, la sal y la pimienta. A continuación, calienta un poco de aceite en una sartén y rehoga a fuego medio la berenjena (previamente escurrida) junto con el ajo y las especias machacadas, hasta que todo quede blandito.

OJO: La receta original del mutabal se hace con las berenjenas asadas al horno (durante unos 30-35 minutos a unos 180ºC).

2. Triturar
Es preferible dejar enfriar un poco la berenjena antes de triturarla. Una vez en el vaso de la batidora, se añade una cucharada de tahini y un poco de zumo de limón y se tritura hasta que la consistencia sea la adecuada. En este punto podemos rectificar el punto de sal y de pimienta. Deja que se enfríe a temperatura ambiente y disfrútalo con pan de pita (puedes añadir un poco de pimentón y un chorrito de aceite de oliva por encima, para servirlo). ¡Rico, rico!


************************


Ingredients
- 1 Aubergine
- 2 Garlic cloves
- 1 Teaspoonful of cumin
- 1 Spoonful of tahini (sesame paste)
- Lemon juice
- Salt
- Ground pepper
- Olive oil
- Paprika (optional)

1. Lightly fry
Peel and cut into cubes the aubergine, and they are left soaking with a little of salt for around 20 minutes to prevent a bitter taste (drain and change the water at heat once). Meanwhile, peel and crush in a mortar the garlic cloves, the cumin, a little of salt and a little of ground pepper. Then, heat a little of olive oil in a pan and lightly fry the aubergine cubes (drained previously) with the crushed seasoning, until they are soft.

NOTE: You'd know that the original recipe of mutabbel is made with roasted aubergines (for about 30-35 minutes in the oven).

2. Mash
It is advisable to let the aubergine cool down before mashing. Don't forget to add a spoonful of tahini and a little of lemon juice in this step, so mash the cream until obtaining the desire texture. Add salt and pepper to taste. Let it cool down at room temperature before serving, and eat it with pita bread (you can season with a little of paprika and a dash of olive oil). Yummy, yummy!

GuardarGuardar
GuardarGuardarGuardarGuardar
GuardarGuardar

domingo, 4 de marzo de 2018

TARTA DE QUESO (sin huevo)


Aunque en mi casa no solemos celebrar el día de San Valentín, este año quise preparar una tarta de queso para mi "cómplice" en la vida, como sorpresa en el "día oficial de los enamorados", ya que éste es uno de sus postres favoritos (y el pobre llevaba siglos pidiendo que le hiciera una).

Pensaba que me faltarían los utensilios necesarios para preparar una, pero con esta fácil receta no se necesitan ni molinillo, ni varillas eléctricas, ni microondas, ni horno.


Ingredientes
- 25-30 galletas
- 60 g de mantequilla (sin sal)
- 400 g queso crema (aproximadamente. 1 tarrina y media de Philadelphia) 
- 400 ml de nata para montar (35% de materia grasa)
- 80 g de azúcar
- 4 láminas de gelatina neutra
- Mermelada de arándanos

1. Base de galletas 
Con ayuda de un mortero vamos machacando las galletas, hasta que parezca arena. En un cazo, derretimos la mantequilla a fuego lento; y después la agregamos a nuestras galletas, removiendo bien, hasta que parezca una especie de pasta.
En un molde (previamente forrado con papel vegetal), vamos compactando la mezcla anterior con ayuda de una cuchara, para formar la base de nuestra tarta. Una vez lista, la reservamos en el frigorífico.

2. Crema
A continuación, ponemos en remojo las hojas de gelatina. Mientras, echamos en un cazo el queso crema, el azúcar y la nata, y calentamos todos los ingredientes a fuego medio-bajo con el fin de que el azúcar se disuelva y la mezcla quede bien integrada (aproximadamente. 10-12, sin dejar de remover). En caso de que queden algunos grumos del queso sin fundir, podemos colar nuestra mezcla.
Una vez fuera del fuego, añadimos las hojas de gelatina (previamente escurridas) y removemos bien nuestra crema.

3. "Al frigorífico"
Vertemos la mezcla sobre nuestra base de galletas, y dejamos que se enfríe a temperatura ambiente antes de dejar que repose y cuaje en el frigo durante unas 6-8 horas (aunque mi recomendación es hacerla de un día para otro).

4. Decoración
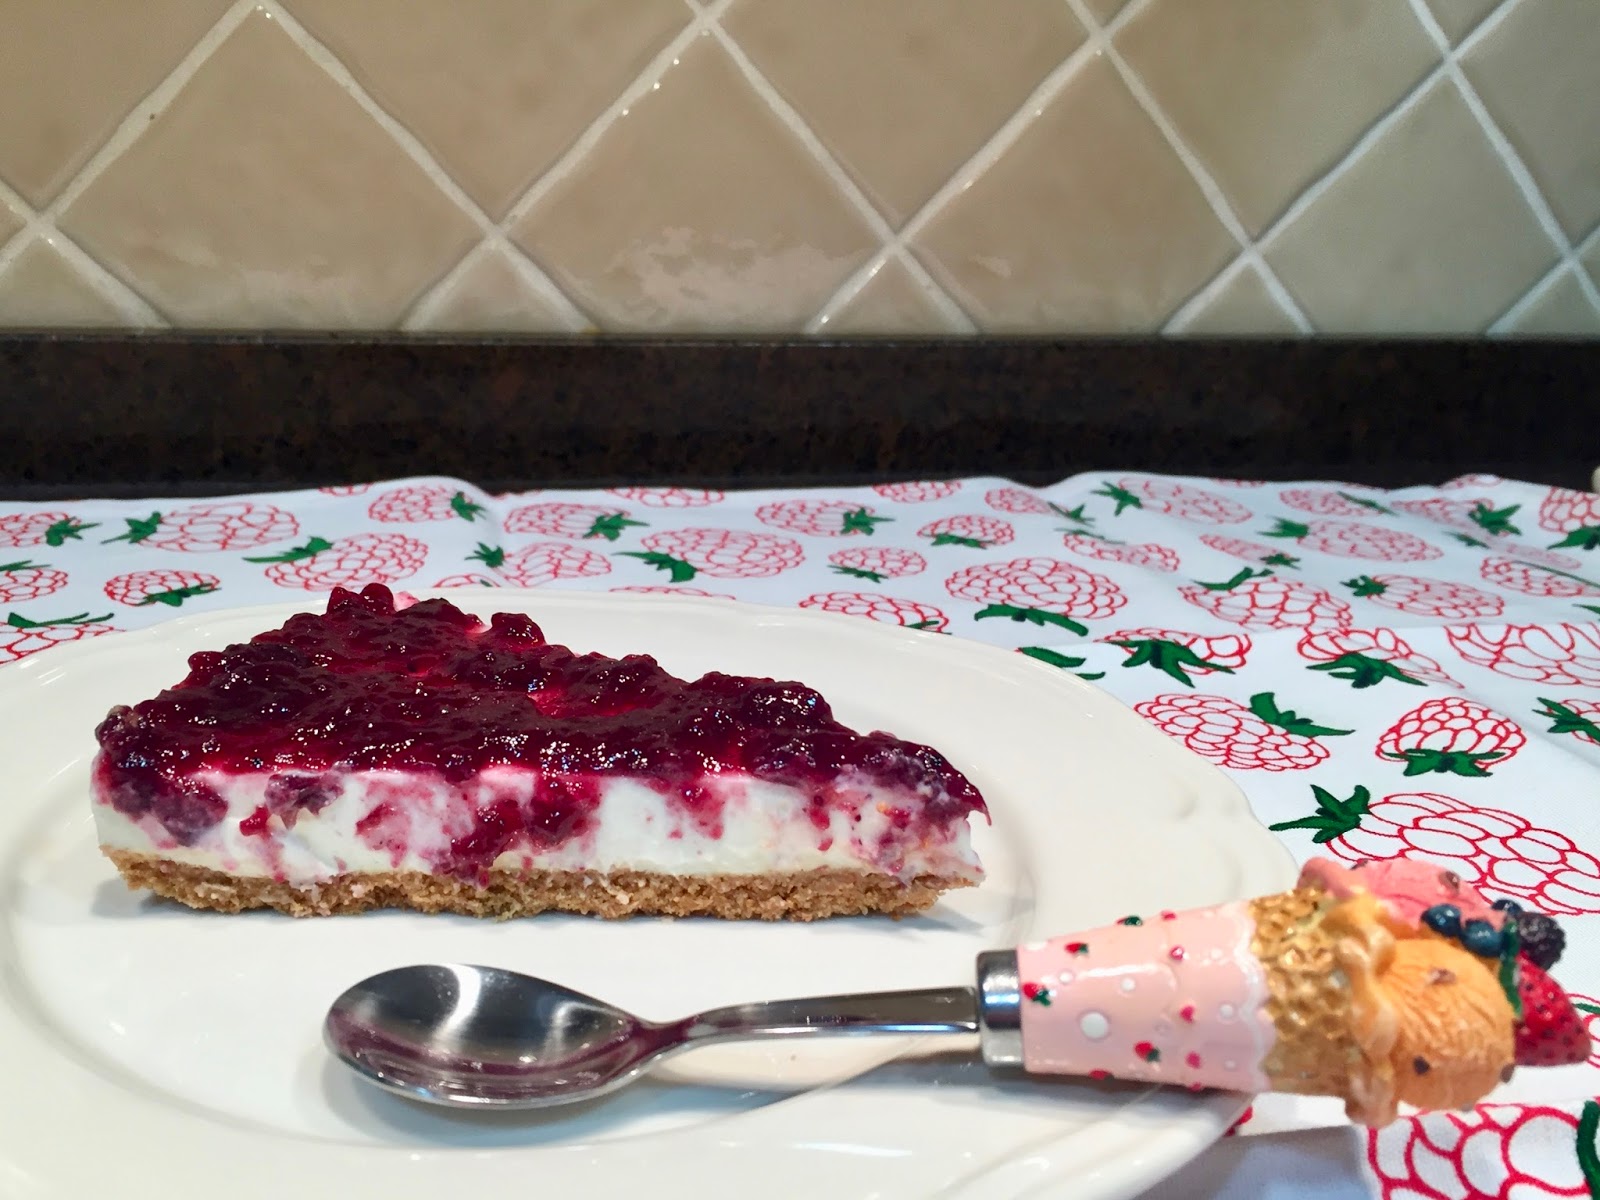
Antes de desmoldarla, añadimos la mermelada que más nos guste. En este caso, utilicé mermelada de arándanos (pero antes de untarla sobre la tarta, es mejor removerla en un pequeño bol para que así esté un poco menos pastosa y cueste menos trabajo). Sin lugar a dudas, ¡repetiré pronto la receta!

NOTA: El molde utilizado tiene unos 26 cm de diámetro, por eso la tarta parece "bajita". Por otro lado,  se desmoldó sin problemas.

¡EXITAZO TOTAL!

************************

We don't usually celebrate Valentine's Day at home, but this year I wanted to surprise my fiancé, so I decided to make a cheesecake for him because it is one of his favourite dessert (and he had been asking me to make one for several years). 

I thought I wouldn't have all necessary cooking utensils to prepare one, although with this recipe you don't need special gadgets (no food processor, no wire whisk, no microwave, no oven).


Ingredients
- 25- 30 biscuits
- 60 g butter (without salt)
- 400 g cream cheese (one bowl and half of Philadelphia)
- 400 ml cream (to whip, with 35% fat)
- 80 g sugar
- 4 sheets of unflavoured gelatin
- Blueberry jam

1. Biscuit base
Crush the biscuits in a mortar until obtaining fine crumbs. Melt the butter in a saucepan on low heat. Then, mix the melted butter and the biscuits in order to form a paste that will be the base of the cake.
Line a cake tin with greaseproof paper, and place the prepared mixture pressing it down firmly with the back of a spoon. Once it is ready, place it in the fridge.

2. Cream
First, soak gelatin sheets in cold water. Meanwhile, in a medium saucepan pour the cream cheese, the sugar and the cream, stir and cook this blend on a medium-low heat until the ingredients are well combined (approximately for about 10-12 minutes). Once the cream is ready, if there would be any clump of cheese without melting, we can strain the mixture.
Remove from the heat. Then, squeeze the gelatin sheets, and add them to the cream and stir well.

3. "To the fridge"
Pour the cream over the biscuit base, and let cool at room temperature before chilling in the fridge for about 6-8 hours (although I recommend to make the cheesecake one day before).

4. Decoration
Before removing from the mould, spread our favourite jam. I used blueberry jam (but first, it's a good idea to stir it in a separate bowl in order to make this task easier). I have no doubt that I will make it again!

NOTE: My mould is 26 cm in diameter, for this reason the cheesecake seems low. On the other hand, it was very easy to remove it from the cake tin.

WHAT A SUCCESS!

GuardarGuardar
GuardarGuardar
GuardarGuardarGuardarGuardar