martes, 7 de julio de 2015

GAZPACHO DE TOMATE Y FRESAS


Gracias al programa de televisión de ROBIN FOOD: ATRACÓN A MANO ARMADA, descubrí lo fácil que es preparar un gazpacho con un punto diferente. Así que, siguiendo las instrucciones de dos grandes de la cocina española como Martín Berasategui y David de Jorge, os traigo la receta de hoy (eso sí, la traduciré como siempre al inglés de la mejor manera posible ¡pero acepto críticas constructivas para mejorar el nivel!).


Ingredientes
- 600 g de tomate maduro
- 400 g de fresas
- 50 g de pimiento rojo
- 60 g de pimiento verde
- 1/2 diente de ajo
- 80 g de pepino
- 40 g de miga de pan cateto
- 150 g de aceite de oliva
- 1/2 litro de agua mineral
- 20 g de vinagre de jerez
- Pimienta molida
- 12 g de sal gorda
- Acompañamiento: Mozzarella fresca, jamón serrano y fresas.  

NOTA: Con estas cantidades salen aproximadamente 2 litros de gazpacho.


1. ¡Batidora!
Se lava bien toda la verdura (tomates, pimiento rojo y verde, pepino) y se cortan en trozos para facilitarle el trabajo a la batidora, y quitando las semillas a los pimientos y al pepino. Siguiendo el consejo de Martín, es recomendable dejar todas las verduras cortadas en un cuenco junto con los demás ingredientes (ajo, miga de pan, el vinagre de jerez, el agua mineral, el aceite y la sal) para que maceren durante 8 horas en el frigorífico, antes de batirlos junto con las fresas (pero yo tuve poco tiempo, así que hice la receta sin esperar esa maceración de las verduras). Una vez batidos todos los ingredientes en nuestra batidora de vaso, se prueba para rectificar con el toque de sal y de pimienta necesarios para dejar el gazpacho a nuestro gusto, y se guarda en la nevera para poder servirlo bien frío.

2. Degustación
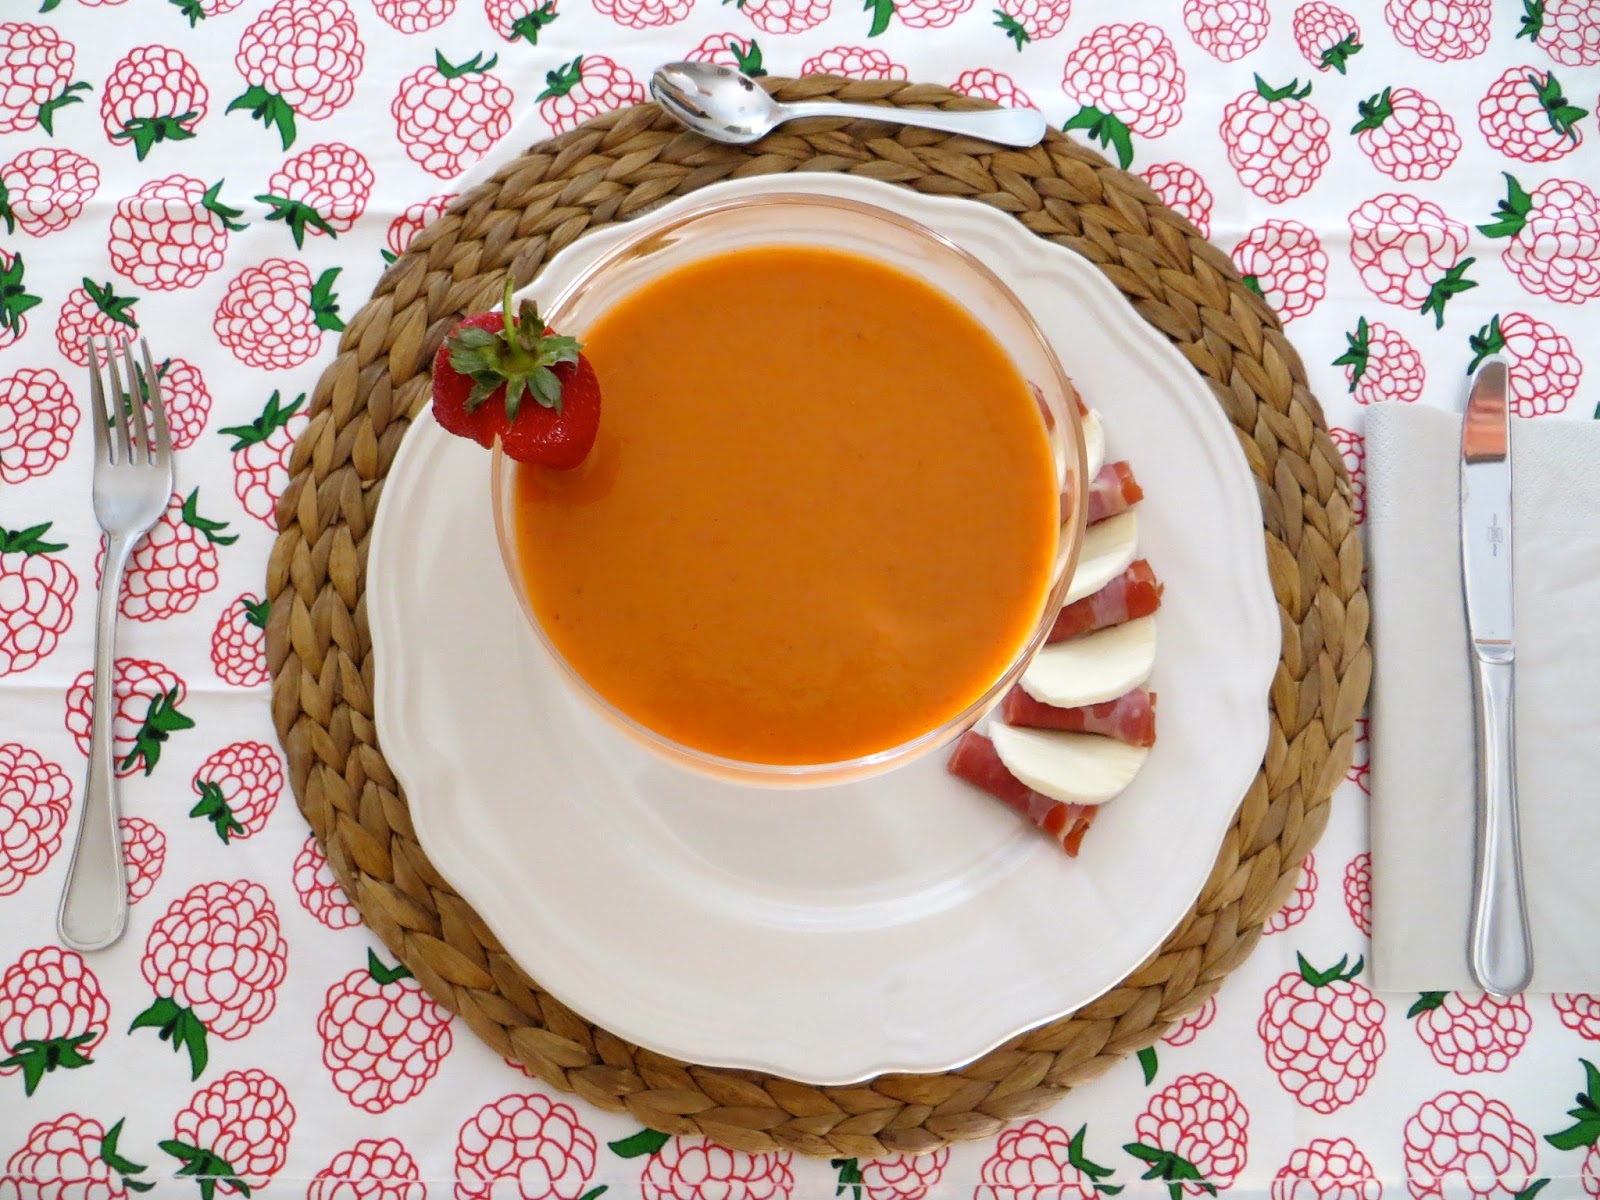
Acompañamos nuestro gazpacho con rulitos de jamón serrano, rodajitas de queso mozzarella y fresas. Y lo podemos convertir en un plato sublime si el jamón que utilizamos es de pato, tal y como nos proponen los chefs. ¡Menudo plato fresquito y rico para este veranito! ¡Ya mismo lo preparo de nuevo!

************************

Thanks to the cooking programme ROBIN FOOD: ATRACÓN A MANO ARMADA (Robin Food: Pigging out), I discovered that it's very easy to make a delicious gazpacho (tomato soup served cold), but adding an unexpected ingredient (strawberry). So, following the instructions given by two of Spain's culinary grandees, Martín Berasategui & David de Jorge, today I am going to show this recipe (as always, I do my best to translate it into English, but I accept constructive criticisms to improve my level!).


Ingredients
- 600 g of ripe tomatoes
- 400 g of strawberries
- 50 g of red pepper
- 60 g of green pepper
- 1/2 garlic clove
- 80 g of cucumber
- 40 g breadcrumbs of country style bread
- 150 g of olive oil
- 1/2 litre of mineral water
- 20 g of sherry vinegar
- Ground pepper
- 12 g of sea salt
- Accompaniment: Fresh mozzarella, serrano ham and strawberries.

NOTE: With these quantities of ingredients I made about 2 litres of gazpacho.


1. Mixer!
Wash and cut into pieces all the vegetables (tomatoes, red peppers and green peppers -seedless-, cucumber -peeled and seedless-) to make easier its job to the mixer. If we had followed Martín's advice, we would have left the vegetables with the rest of the ingredientes (garlic clove, breadcrumbs, sherry vinegar, mineral water, olive oil and salt) to marinate in the fridge for 8 hours, and then use the mixer to blend them together adding the strawberries at the eleventh hour (but I hadn't enough time and I made the recipe skipping this step). When the gazpacho is finished, season it with salt and ground pepper if it is needed. Keep in the fridge in order to cool down until their tasting.

2. Tasting
It's ideal accompany our gazpacho with rolled up serrano ham, sliced mozzarella and strawberries. But, if you want the dish to turn into a superb gazpacho, use cured duck breast, as chefs propose. What a fresh delicious dish! I can't wait to make it again!

domingo, 21 de junio de 2015

TARTA DE GALLETAS PARA CUMPLEAÑOS


Cuando mi cuñada me dijo si había hecho alguna vez una tarta de galletas, no dudé ni un segundo en decirle que aunque hacía años que no las hacía (de niña ayudaba algunas veces a mi madre a prepararlas), intentaría que la tarta para el cumpleaños de mi sobrina saliera lo mejor posible. Así, después de consultar a mis asesoras culinarias (madre y tía repostera -Los Sabores de Ana-) y siguiendo mi propia intuición, preparé una tarta que quedó deliciosa además de bonita.


Ingredientes
- Galletas cuadradas
- Leche entera
- Chocolate (para hacer a la taza)
- Canela molida
- Decoración para ponerla bonita: fideos de colores, mininubes, velas de colores, banderín "Happy Birthday".

NOTA: Las cantidades totales de los ingredientes quedan resumidas en la primera imagen, teniendo en cuanta que la tarta resultó ser de unos 20 cm x 26 cm.


1. ¡Chocolate!
Para preparar el chocolate, lo mejor es seguir las instrucciones que nos proporcione el paquete, pero duplicando la cantidad de chocolate que nos indiquen para que así salga más espeso. En mi caso concreto, preparé el chocolate en dos veces (porque no sabía lo que iba a necesitar), y en cada una de estas veces, utilicé medio litro de leche tibia en los fui disolviendo unas 18 pastillas de chocolate, removiendo continuamente la mezcla a fuego lento sin dejar que llegara a hervir. Después, lo dejé enfriar un poco antes de ponerlo sobre las galletas.

2. Galletas y montaje
En un vaso de leche añadimos un par de cucharaditas de canela, y batimos lo mejor posible para no dejar grumitos. Y ya está todo listo para empezar a montar la tarta. Sólo hay que mojar cada una de las galletas en el vaso de leche con canela (sin dejar que se empapen demasiado), e ir colocándolas sobre una bandeja. Cuando la primera capa de galletas queda lista, aplicamos una capa generosa de chocolate, y volvemos a repetir estos dos pasos hasta conseguir la altura que queremos. Cuando hayamos terminado, sólo hay que cubrir los lados de la tarta con más chocolate, y dejamos que se enfríe en la nevera.

3. ¡A decorar!
La decoración es mejor dejarla hasta momentos antes en que vayamos a tomar la tarta (justo antes de soplar las velitas), para que así quede más vistosa y con colores más vivos. En este caso, utilicé fideos de colores, nubecitas y un banderín de "Happy Birthday" que montamos nosotros, gracias a una plantilla de abecedario (tomada del blog "Yellow Bliss Road"), dos cordones, dos palillos de madera (de los que usamos para hacer brochetas), tijeras y pegamento.

¡¡TODOS ESPERAMOS QUE PASARAS UN GRAN DÍA!! ¡¡FELICIDADES, PRECIOSA!!


************************

When my sister-in-law asked me if I could make a no-cook biscuit and chocolate cake, I didn't hesitate for a second and I told her that I'd do anything to make it out delicious. Then, I was talking to my cooking advisers (my mum and my aunt, whose blog is called -Los Sabores de Ana-) in order to remember what ingredients I would need and all the steps to follow. The final result was a luscious and beautiful birthday cake.


Ingredients
- Square biscuits
- Whole milk
- Chocolate
- Ground cinnamon
- Decoration: coloured sugar, mini-marshmallows, birthday candles, little flags.

NOTE: To make a cake whose dimensions are 20 cm x 26 cm, as you can see in the first picture, we need:
36 squares of chocolate   +   1 litre of milk
120 square biscuits   +   1 glass of milk with cinnamon 


1. ¡Hot chocolate!
To make hot chocolate, you should follow the instructions, but doubling the amount of chocolate in order to get a less fluid chocolate. In my case, I used 18 squares of chocolate on half a litre of warm milk, and I repeated the operation twice (because I didn't know how much chocolate I was going to need). Once the chocolate is dissolved, we stir it constantly over low heat, and at least, let it cool down before building the cake.

2. Biscuits and preparation
Add two teaspoon of ground cinnamon in a glass of milk, and stir it until there are no lumps. Then, you only have to dunk the biscuits in the milk and place them on a tray. When the first layer is made, cover it generously with the chocolate, and repeat both steps about three times more. When you have finished, cover the four sides of our cake, and let it cool down into the fridge.

3. Time to decorate!
It is better to decorate the birthday cake just before blowing the candles, so that the colours are more vivid and the cake is more eye-catching. In this case, I added colored sugar, mini-marshmallows and little flags with the phrase "Happy Birthday" (whose template was taken from the blog "Yellow Bliss Road").

WE ALL HOPE YOU SPENT A GREAT DAY!! HAPPY BIRTHDAY TO YOU!!


martes, 2 de junio de 2015

SMOOTHIE DE "AMASQUILLOS"


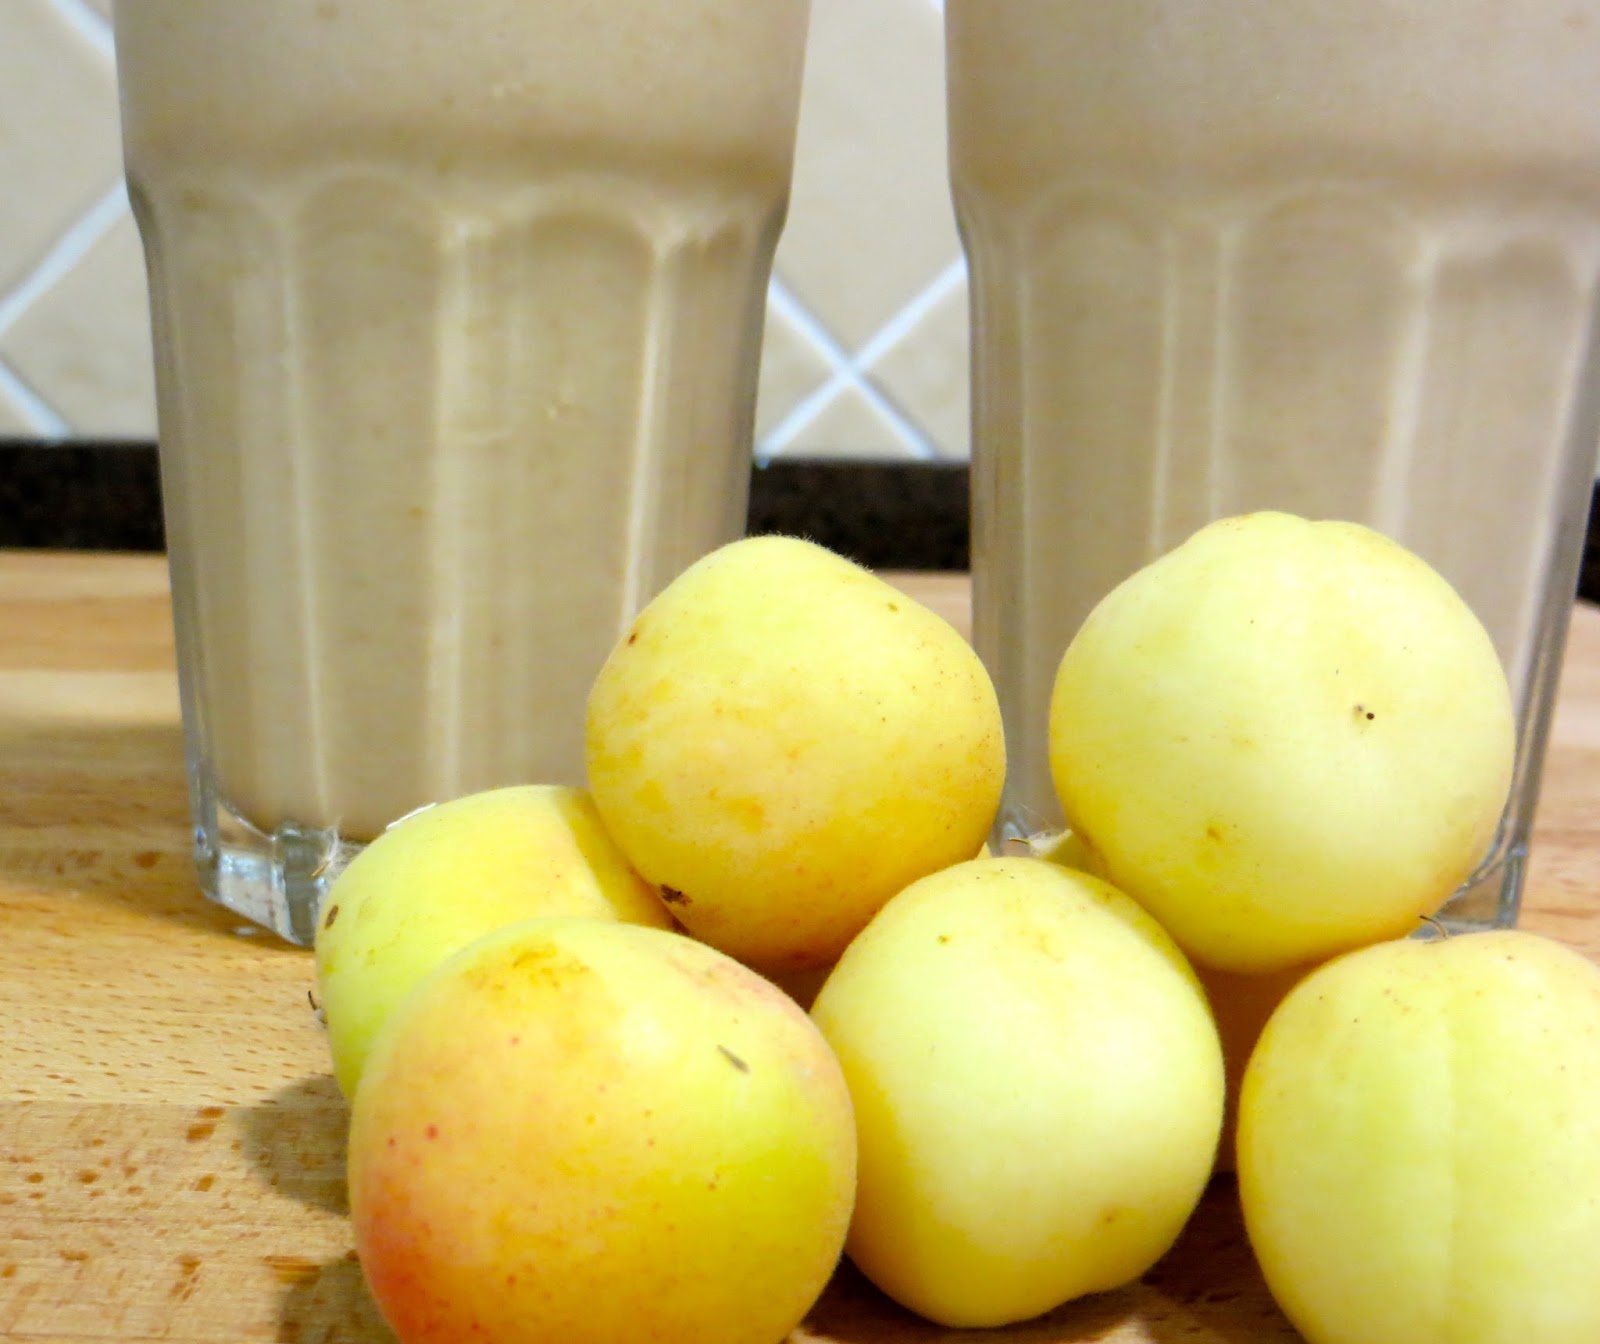
Si alguien se pregunta ¿qué son los "amasquillos"?, ¿dónde puedo conseguir esta fruta para hacer este batido? La respuesta es tan sencilla que, sólo hay que mirar la fotografía y reconocer que esos frutos son ALBARICOQUES.

"Amasquillo" es simplemente la denominación que se le da a esta fruta en mi tierra, Málaga. Si os preguntáis por qué, os puedo explicar que aunque el nombre común del árbol es albaricoquero o, simplemente, albaricoque, en regiones como Andalucía se le conoce también como damasco, y de ahí que su fruto se llame damasquillo, palabra que evolucionó a "amasquillo" (así son las cosas del lenguaje).


Ingredientes
- Albaricoques o amasquillos (en malagueño)
- Yogur natural griego (sin azucarar)
- Cubitos de hielo

1. Bátelo todo
Para preparar dos vasos como los de la foto, se necesitan unas dos docenas de albaricoques (a los que simplemente les quitamos el hueso tras enjuagarlos) y 2 vasos de yogur griego. Una vez batidos, añadimos un par de cubitos de hielo en nuestra batidora de vaso, de forma que el "smoothie" queda más ligero y refrescante tras mezclarse con el hielo picado. ¡Rico, rico! Aunque si lo queréis probar, hay que darse prisa porque esta fruta es de temporada.


************************

"Amasquillo" is the name to ask for apricots in a greengrocer in Malaga, my homeland. Although it has a very different name from the usual Spanish word of this fruit ("albaricoque"), the explanation is that this word developed from "damasco" which is another name to describe apricot trees in Andalusia (the language evolution).


Ingredients
- Apricots
- Greek plain yoghurt (unsweetened)
- Ice cubes

1. Blend everything
Add two dozens of apricots (rinsed and boneless) and 2 Greek plain yoghurts in the glass of the mixer in order to make two glasses of delicious smoothie (as can be seen in the photographs). Blend until the smoothie becomes homogeneous, and then, add two ice cubes and blend again to obtain a cool beverage. It tastes great! But, hurry up! because apricots are seasonal fruits.

lunes, 18 de mayo de 2015

BANDERILLAS CAPRESE


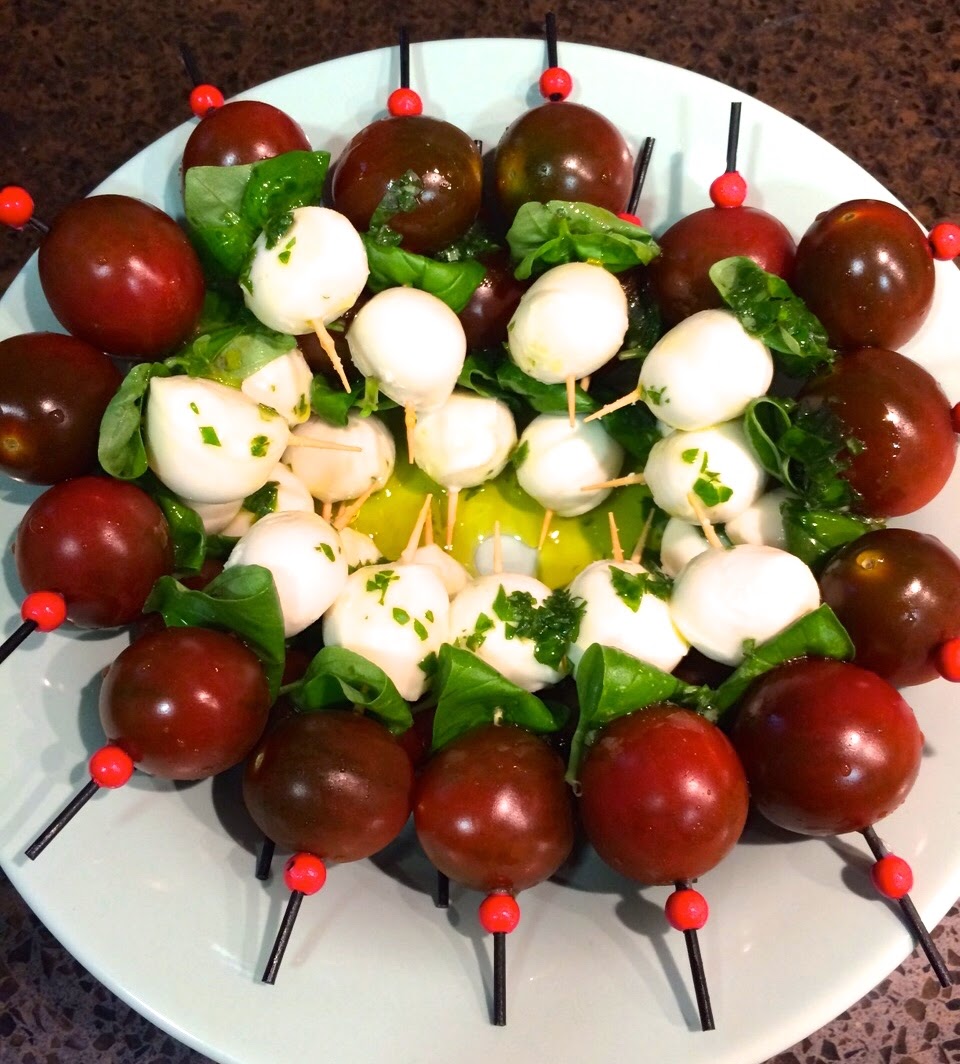
Como podéis comprobar, es muy fácil recordar los ingredientes que necesitamos para elaborar una ensalada Caprese, ya que el color de los mismos (los tres principales) coincide con cada uno de los colores de la bandera italiana. Y aunque en esta ocasión, hemos preparado unas banderillas, el resultado queda igual de rico si los ingredientes los podemos cortar en rodajas, que es como normalmente nos sirven la típica ensalada Caprese en los restaurantes italianos. 


Ingredientes
- Tomates cherry
- Perlas de mozzarella fresca
- Hojas de albahaca fresca
- Sal
- Aceite de oliva

1. Pinchos y aliño
Tras lavar los tomates y las hojas de albahaca fresca (de nuestro huerto urbano), se secan con papel absorbente, y se van montando todas las banderillas: tomate-albahaca-mozzarella. Una vez dispuestas todas en una fuente, se añade un poco de sal y un chorrito de aceite de oliva. ¡Aperitivo facilísimo, vistoso y delicioso!

TRUCO: Para acentuar el sabor de la albahaca, en este caso, hemos cortado algunas hojas y las hemos mezclado con el aceite de oliva antes de aliñar el plato.

************************

Today, we have travelled to Italy,
and more specifically to the Island of Capri,
because the Caprese salad came from this place.

Furthermore, as you can realise, it's very easy to remember the three ingredients we need to make a Caprese salad, because their colours resemble the colours of the Italian flag. Although, we have prepared skewers with the ingredients, the result is such delicious if we slice them instead, that is usually the way Italian restaurants serve their typical Caprese salad.


Ingredients
- Cherry tomatoes
- Pearls of fresh mozzarella
- Fresh basil leaves
- Salt
- Olive oil

1. Skewers & dressing
After washing the tomatoes and the fresh basil leaves (grown in our urban garden), they are all dried with kitchen towels, and we insert the ingredients in the skewers: tomato-basil-mozzarella. Once we finish, the next step is to dress with a little of salt and a dash of olive oil. What such a easy, eye-catching and delightful starter!

TRICK: To boost the flavour of basil, we have mixed olive oil with a few of chopped fresh leaves before dressing the dish.

viernes, 8 de mayo de 2015

SMOOTHIE DE MANGO Y FRESAS


Ingredientes
- Mango
- Fresas (congeladas)
- Yogur natural griego (sin azucarar)
- Miel
- Cubitos de hielo

1. Bátelo todo
Para hacer unos tres vasos de este delicioso "smoothie", se necesita 1 mango (pelado y troceado), un puñado de fresas (previamente limpias y congeladas), 2 vasos de yogur griego y 1 cucharadita de miel (como se aprecia en las fotos de la batidora). Una vez que se baten todos los ingredientes hasta que la mezcla resulta homogénea, se añaden un par de cubitos de hielo que ayudarán a que el "smoothie" sea un poco más ligero y fresco y se bate de nuevo. ¡Simplemente decir, que ya tengo fresas congeladas para repetir la experiencia! ¡Qué rico estaba!

TRUCO: Lo de congelar las fresas, podemos aplicarlo a cualquier fruta que se haya madurado en casa al punto que más nos gusta (por ejemplo: plátano, manzana, ...), pero que justo en ese momento no tenemos la oportunidad de tomarlas (porque nos han invitado a comer, tenemos alguna cena prevista, o algún viaje programado); así, de ese modo, si las guardamos en el congelador (ya peladas y en trocitos) las tendremos listas para preparar con ellas un batido cuando nos apetezca. Además, ese punto de congelación hace que nuestro smoothie sea aún más refrescante y que su textura sea la adecuada.

************************

Ingredients
- Mango
- Strawberries (frozen)
- Greek plain yoghurt (unsweetened)
- Honey
- Ice cubes

1. Blend everything
Add these ingredients in the glass of the mixer in order to make about 3 glasses of delicious smoothie: 1 mango (peeled and cut up into pieces), some frozen strawberries (150 g approximately), 2 Greek plain yoghurts and 1 teaspoon of honey. Blend until the smoothie becomes homogeneous, and then, add two ice cubes and blend again. Only, I'm saying to you that I have some strawberries in the freezer to repeat the recipe! It tasted superb!

TRICK: If we freeze pieces of fruit at optimal ripeness (strawberries, bananas, apples, ... -always peeled and cut into pieces-), we can use them to make our smoothies ever time we would have enough time to prepare them and, what is more important, to savour them. Furthermore, this makes our smoothie would be more refreshing and would have a right texture.

domingo, 3 de mayo de 2015

GALLETAS DE MANTEQUILLA


Basándome en la receta de "Galletas bicolor" del blog de mi tía LOS SABORES DE ANA he preparado mi versión 1.0 de estas galletas. Por el resultado, tengo que decir que en mi familia hay muy buenas cocineras y otros muchos "cocinillas" que se defienden valientemente frente a los fogones (celebrando sublimes victorias), y a lo mejor, he heredado parte de esos talentos porque las galletas (para ser las primeras que hago en mi vida) han salido deliciosas. Y no lo digo porque las haya hecho y probado yo, prometo que he tenido unos cuantos "jueces" que las han evaluado con buena nota.


Ingredientes
- 300 g. harina
- 90 g. azúcar glas
- 200 g. mantequilla (sin sal)
(NOTA: Con estas cantidades, me han salido unas 42 galletas)


1. Masa
Mezclar en un bol la harina y el azúcar. A continuación, derretimos la mantequilla en un cazo a fuego lento; después se añade a la mezcla anterior, y se remueve para que todos los ingredientes queden bien integrados. Se hace una bola con toda la masa, se envuelve en papel film y se deja en la nevera unos 30 minutos para que coja consistencia y se pueda trabajar con más facilidad. 

2. Cortar las galletas
Para trabajar la masa, es mejor ir tomando pequeñas porciones, dejando siempre el resto en la nevera mientras se cortan las galletas. Lo mejor es colocar esos trozos de masa entre dos láminas de papel film, e ir estirándola con el rodillo de amasar. Con un molde (∅6 cm), cortamos las galletas cuando la masa tenga un espesor aproximado de medio centímetro; a continuación, nos podemos ayudar de una lengua para pasarlas a una bandeja de horno con papel sulfurizado. Se pueden adornar simplemente haciendo marcas con un cuchillo, o bien con un sello (como puede verse en las fotos).

3. Horneado
Con el horno a 180ºC, en sólo 12 minutos tendremos listas nuestras galletas de mantequilla. Esperad a que se enfríen, antes de probarlas, porque ¡no podréis comer sólo una! ¡Os aseguro que son irresistibles!


IMPORTANTE: Además, que no se me ha olvidado, esta receta viene con una dedicatoria especial. Y es que prometí mencionar en mi blog a tres compañeras de trabajo de mi novio, que durante el tiempo que compartieron interminables jornadas laborales fueron fieles a mi blog (aunque no lo actualizara en semanas), y espero que sigan siéndolo. Así que Elena, Dulce y Mai, estas galletas, en parte, son también para vosotras. ¡Qué tengáis mucha suerte, chicas!


************************

Based on the "Bi-coloured cookies" recipe posted by my aunt Ana on her own blog LOS SABORES DE ANA, I have made my own 1.0 version of cookies. I think I had inherited some talent for cooking from my family because some of them cook truly well, moreover this time was my first making  cookies and they were delicious. And, this isn't only my own opinion since many people had the opportunity to taste the butter biscuits and all they congratulated me for them.


Ingredients
- 10,6 oz. flour
- 3,2 oz. icing sugar 
- 7,0 oz. butter (without salt)

1. Blend
First, mix inside a bowl flour and sugar. Next, melt butter over a low heat in a sauce pan; after that, pour it over the dry blend, and stir all the ingredients until obtaining an homogeneous mass. Wrap all the mass with cling film and let it cool down in the fridge for about 30 minutes (it will be easier to knead the mass).

2. Cut cookies
To knead easily the mass, it's better to take small ball of mass, while the rest of it is placed back in the fridge. The second trick is place this ball between two sheets of cling film, and roll out until get a thickness of about 0,5 cm. Remove the upper sheet, and use a cookies cutter (∅6 cm); then, put all the cookies on an oven tray with greaseproof paper. If you want to decorate the cookies, you can use either a knife or a cookie stamp (you can see the results in the pictures).

3. Baking
Bake them into the oven preheated to 180ºC for about 12 minutes. The butter cookies will be ready to be eaten, but it's better to let them cool down. It isn't possible to eat only one! They are irresistible! 


IMPORTANT: As I promised, I dedicate this recipe to Elena, Dulce y Mai (they are three ex-workmates of my boyfriend), because they were loyal followers of my blog while they were working with him, and I hope that, nowadays, they still read my blog (even if I don't have enough time to update it). Good luck, Powerpuff Girls!

martes, 7 de abril de 2015

ATÚN CON PIMIENTOS


Ingredientes
- Atún (o bonito)
- Cebolla
- Tomate maduro
- Pimientos rojos y verdes
- Vino blanco
- Tomillo
- Laurel
- Sal
- Pimienta
- Aceite de oliva

1. Verduras
Por un lado, se cortan en tiritas más o menos finas la cebolla y los pimientos que vayamos a usar (mejor si cogemos de las dos clases, ya que además de hacer el plato más sabroso, lo hace más vistoso), y se fríen en una sartén con un poco de aceite hasta que la cebolla se ponga transparente.
Por otro lado, se pela el tomate y se corta a daditos (sin simientes), se añade al sofrito y se mezclan todos estos ingredientes.

2. Aderezo y pescado
A continuación se añade un buen vaso de vino blanco, un puñadito de sal, pimienta y las hierbas aromáticas (tomillo y una hoja de laurel), y se deja cocer todo durante unos 15 minutos. Y por último, añade los filetes de atún y deja que se cueza todo unos 10 minutos más a fuego lento. Un guiso rápido, delicioso y colorido!

NOTA: Si te gusta "hacer barquitos con el pan", tapa la sartén mientras se cuece el guiso para que no se evapore toda esa salsita.

************************

Ingredients
- Tuna (or bonito)
- Onion
- Ripe tomato
- Green and red peppers
- White wine
- Thyme
- Bay leaf
- Salt
- Ground black pepper
- Olive oil

1. Vegetables
On the one hand, cut into strips the onion, and the red and green peppers (it will be more flavourful and more eye-catching because of the different colours); then, fry slightly in a pan with a little olive oil until onion is translucent.
On the other hand, peel the tomato and cut into dices (without seeds), add into the frying pan and mix all the ingredients.

2. Dressing & fish
Next, add a good glass of white wine, a handful of salt, ground black pepper and the aromatic herbs (thyme and a bay leaf), and leave everything to cook for about 15 minutes. Finally, add the fish fillets (tuna or bonito) and let the stew simmer for 10 minutes. It's a quick stew, delighful and colourful! 

NOTA: If you like to dip your bread into the sauce, you should cover the frying pan while the stew is being cooked to avoid the evaporation.