martes, 17 de enero de 2017

CUPCAKES casi VEGANOS (sin azúcar ni huevo)


Ingredientes (para 12 cupcakes)
Leche
- Vinagre de manzana
- Sirope de ágave
Aceite de girasol
Extracto de vainilla
Harina para repostería
Levadura para repostería
Bicarbonato
- Sal 
- Queso de untar (para el "frosting")

1. Suero de mantequilla o buttermilk
Mezcla en un bol 150 ml de leche y 1 cucharada de vinagre de manzana, y después déjala reposar unos 10-15 minutos a temperatura ambiente, hasta que adquiera la apariencia de leche cortada. Este suero ayudará a que nuestros bizcochos queden tiernos y esponjosos (cosa totalmente necesaria al prescindir de los huevos en nuestra receta).

2. Mezcla húmeda
A continuación, añade sobre la mezcla anterior: 120 ml de sirope de ágave, 80 ml de aceite de girasol y 2 cucharadas de extracto de vainilla, y batimos con la varilla manual hasta que quede un líquido homogéneo.

3. Mezcla seca 
Por último, incorpora los ingredientes secos (tamizándolos para que queden bien repartidos y no se formen grumos): 160 g de harina, 3/4 de cucharada de levadura, 1/2 cucharada de bicarbonato, y 1/4 de cucharada de sal, y bátelo todo hasta que la masa quede homogénea.

4. Horneado
Reparte la masa sobre una bandeja de horno para magdalenas en sus correspondientes moldes (han salido justo 12 cupcakes con las cantidades utilizadas), y hornéalas a una temperatura de 180ºC durante unos 20-25 minutos; puedes verificar si la cocción es adecuada, pinchando el centro con una brocheta y si sale limpia (¡ya están listas!). Una vez fuera del horno, déjalas enfriar antes de añadirle el frosting.

5. Crema de queso
Mezclar bien unos 500 g de queso de untar con 5 cucharadas de sirope de ágape hasta obtener una mezcla consistente y podamos usar la manga pastelera. ¡Decorar y devorar! 

NOTA: En caso de que queráis que el frosting se endurezca un poco, meted los cupcakes en la nevera, aunque tened en cuenta que si lo dejáis mucho tiempo el bizcocho puede secarse.

************************

Ingredients (12 cupcakes)
- Milk
- Apple vinegar
- Agave syrup
- Sunflower oil
- Vanilla extract
- Cake flour
- Baking yeast
- Bicarbonate
- Salt
- Spreadable cheese (to make the frosting)

1. Buttermilk
Blend in a bowl 150 ml of milk and a spoonful of apple vinegar, wait for for about 10-15 minutes at room temperature until it seems like sour milk. In this way, the buttermilk help us to make sponge cakes softer (since we are not going to use eggs).

2. Wet blend
Now, pour over the buttermilk the next ingredients: 120 ml of agave syrup, 80 ml of sunflower oil and 2 spoonful of vanilla extract; then, stir with a whisk until obtaining an homogeneous wet blend.

3. Dry blend
Lastly, add the dry ingredients (keep in mind you should sift these ingredients for avoiding that clots are formed): 160 g of cake flour, 3/4 of spoonful of baking yeast, 1/2 spoonful of bicarbonate and 1/4 of spoonful of salt; stir again with the whisk until the dough is homogenous.

4. Baking
Use paper baking cups on a muffin tray and pour the dough (with these proportions we can make 12 units) in order to bake them in the preheated oven at 180ºC for about 20 o 25 minutes (verify the proper cooking with the help of a stick). Let cool to room temperature before adding the frosting.

5. Cheese frosting
Mix perfectly 500 g of spreadable cheese and 5 spoonful of agave syrup. When the cream is ready to use the pastry sleeve, decorate the muffins and devour them!

NOTE: Save the cupcakes in the fridge, if you want the frosting gets hardened a little.

GuardarGuardar

lunes, 7 de noviembre de 2016

TRENZA DE CHOCOLATE

En mi casa, un día sí y otro también, se nos hace la boca agua viendo alguno de los videos de TASTEMADE, que a través de distintas plataformas y dispositivos ofrece recetas muy inspiradoras y algunas son muy fáciles de hacer. Este es el caso de la trenza de chocolate: mi goloso "Project Manager" vio el video poco antes de su cumpleaños y me pidió que se la hiciera. Aunque el enlace de la receta original podéis verlo aquí, mi sub-chef rubia favorita y yo la preparamos sin huevo (por temas de alergia) y el resultado es igual de apetecible.


Ingredientes
- Hojaldre
- Tableta de chocolate
- Almendras fileteadas
- Almendras crocanti

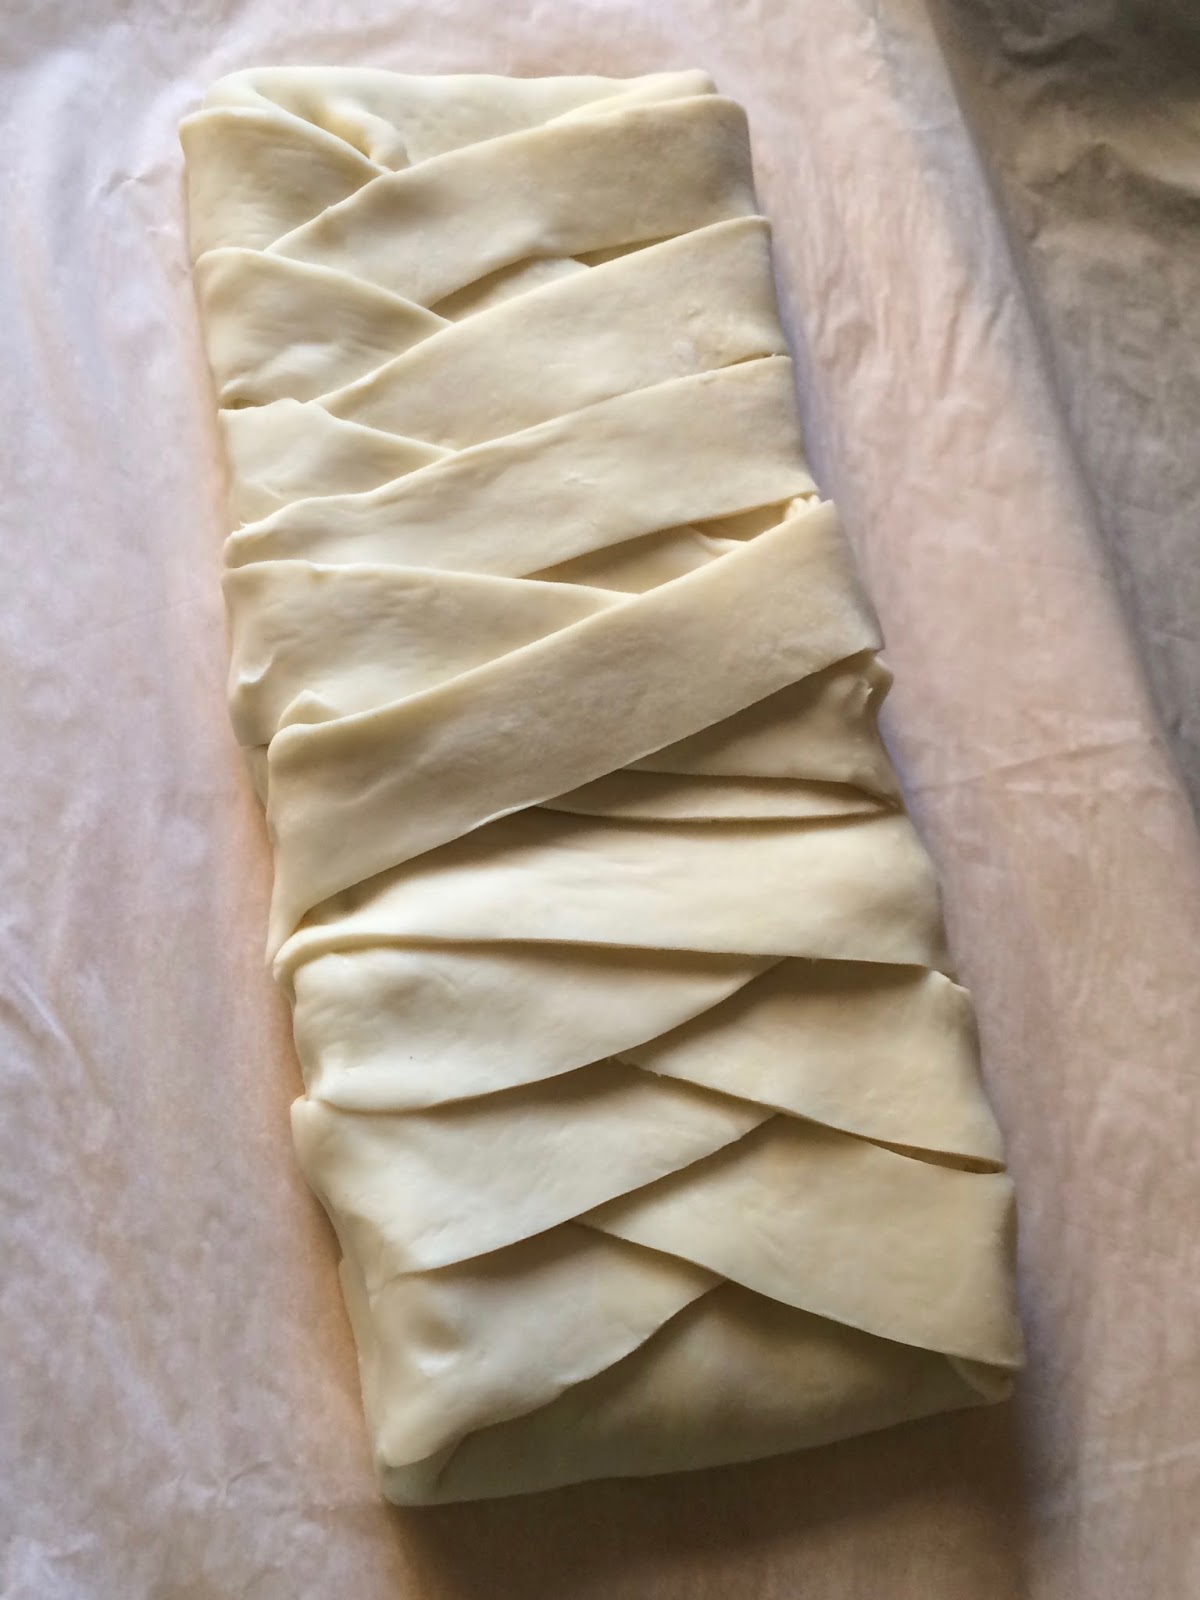
1. Coloca, corta, trenza y adorna
Pon la tableta de chocolate (ver NOTA) en el centro de la masa de hojaldre; después haz cortes a la masa (por el lado más largo de la tableta) y ve trenzando las tiras de masa con el objetivo de cubrir todo el chocolate. Añade tu aderezo favorito, que en nuestro caso fueron almendras crocanti y fileteadas.

2. Hornea
Pon la trenza en el horno precalentado a 200ºC durante unos 20-25 minutos, hasta que el hojaldre se dore. Puedes tomarla tibia o fría, pero en cualquier caso es un postre fácil de hacer y delicioso.

NOTA: Los más golosos pueden utilizar chocolate con leche (para mí, sale un poco empalagosa), y quienes prefieran los dulces no muy dulces pueden usar chocolate negro (así me gusta más). Si utilizáis otro tipo de chocolate (blanco, con avellanas, relleno de trufa, ...), contadme qué tal sale.

************************

TASTEMADE offers us a lot of inspiring recipes and some of them are very easy to make, for this reason our mouths begin to water while we are watching these short cooking videos at home on day in and day out. This is the case of the chocolate braid: my gourmand "Project Manager" watched the video a few days before his birthday and asked me to make it. Although the original video is here, my blonde favourite sub-chef and me made the braid egg free (I am allergic) and the result was very similar. 

Ingredients
- Pastry sheet
- Chocolate bar
- Silvered almonds
- Crunched almonds

1. Put, cut, braid and decorate
Put the chocolate bar on the centre of pastry sheet; after that, cut both longer sides and begin to braid the stripes of the pastry in order to cover the chocolate. Then, add your favourite topping, that in this case, were silvered almonds and crunched almonds.

2. Bake
Bake the dessert in a oven preheated at 200ºC for 20-25 minutes, until the pastry sheet is brown. You can have warm or cold, but it is always an easy to make and delicious dessert.

NOTE: Greedy people can use milk chocolate (although I think the result is a little cloying). So, not so gourmand people can use dark chocolate (this is my favourite). But, if you dare to use another kind of chocolate (white chocolate, with hazelnuts, truffle filling, ...), tell me how is the result, please.

martes, 13 de septiembre de 2016

HUMMUS


Ingredientes
- 2 cucharadas de tahini (pasta de sésamo: ver receta *)
- 400 g de garbanzos cocidos
- 1 diente de ajo
- 1/3 cucharadita de sal
- 1/2 cucharadita de comino molido
- Zumo de medio limón
- Medio vaso de agua
- Aceite de oliva (para decorar)
- Pimentón de la Vera (para decorar)


1. Tahini con mortero (receta)
* Para hacer el tahini sólo vamos a necesitar:

- 2 cucharadas de sésamo tostado
- 4 cucharadas de agua o de aceite de oliva (según queramos que la pasta tenga un sabor menos o más intenso)
- una pizca de sal

Con esta cantidades obtendremos la cantidad exacta de pasta de sésamo para la elaboración de nuestro hummus.


Lo suyo es utilizar un molinillo eléctrico, pero en mi caso, uso el mortero y me armo de paciencia para ir machacando las semillas poco a poco, a medida que voy añadiendo el aceite de oliva hasta obtener una pasta con la consistencia adecuada (tal y como puede verse en la foto). Si fuera necesario aligerar la pasta, podemos poner un poco de agua.

2. Hummus
Enjuagamos los garbanzos (de bote) debajo del grifo y los escurrimos con ayuda de un colador. Vamos a usar la batidora de brazo (ya que resultará más fácil el manejo de la crema de garbanzos), así que en el vaso pondremos todos los ingredientes: los garbanzos, el diente de ajo (pelado), la sal, el comino, el zumo de limón y el tahini que acabamos de preparar, y comenzamos a batir. A medida que vamos batiendo, vamos añadiendo agua poco a poco hasta que hayamos obtenido una mezcla cremosa pero consistente.

3. Opcional
Como idea final, para servir el hummus, ponemos una buena cantidad en un cuenco y lo espolvoreamos con un poco de pimentón, comino y un chorrito de aceite de oliva. Queda buenísimo para tomar con pitas, regañás y todo tipo de tostas, aunque yo lo uso también en sándwiches como alternativa a las mayonesas y en ensaladas para darles un punto de originalidad. Se aceptan nuevas sugerencias.

************************


Ingredients
- 2 spoonful of tahini (see recipe *)
- 400 g boiles chickpeas
- 1 garlic clove
- 1/3 teaspoon of salt
- 1/2 teaspoon of ground cumin
- 1/2 Lemon juice
- Half a glass of water
- Olive oil (decoration)
- La Vera paprika (decoration)

1. Tahini made in a mortar (receta)
* To make tahini, we need:

- 2 spoonful of toasted sesame
- 4 spoonful of water or olive oil (depending on we want to make a tahini with a less or more intensive flavour)
- a pinch of salt

I use a wooden mortar because I don't have a electric mill, so it's easy although laborious to make  tahini. Only you have to mash the sesame seeds little by little, adding the olive oil until we achieve the proper consistence. If it'd be necessary, add a little of water.

2. Hummus
Rinse the chickpeas under the water, and leave to drain. We need a hand blender in order to make it easier. Put all the ingredients in the glass: chickpeas, garlic, salt, ground cumin, lemon juice and tahini, and blend them. We add water little by little while we are blending until we get the chickpeas puree: hummus.

3. Optional
To serve the hummus, put it in a bowl and decorate it with a pinch of paprika, ground pepper and a dash of olive oil. It is delicious with any type of breadsticks or crackers, but you should taste the hummus in a sandwich as a mayonnaise substitute or to dress salads. Some new suggestions are welcome!

sábado, 20 de agosto de 2016

SÁNDWICH DE BERENJENAS


Ingredientes
- Berenjena
- Jamón cocido
- Queso havarti (light)
- Sal

1. Preparación de las berenjenas
Lava y corta la berenjena en rodajas de un cm de espesor. Ponlas a remojo con un poco de sal, después sécalas muy bien. Caliéntalas en un grill, para que se hagan un poco. Ya tenemos listas las "paredes" de nuestro sándwich.

2. Sándwich listo en ... 3, 2, 1
Ahora sólo tienes que buscar 2 rebanadas de berenjenas, lo más parecidas posibles, y rellenarlas con  jamón cocido y vuestro queso favorito (en mi caso: havarti light). Y una vez montados, pon los sandwiches en el grill de nuevo, para que funda el queso.

NOTA IMPORTANTE: Quiero dedicar esta receta tan sencilla a mi primo Fernan (que fue quien me la dijo), por ser tan buen anfitrión y cuidar tan bien de mi hermana en Whistler (British Columbia, Canadá) 🇨🇦. ¡Buena suerte en tu aventura! ¡Te queremos!


************************


Ingredients
- Aubergine
- Cooked ham
- Havarti cheese (light)
- Salt

1. Preparation of the aubergine
Wash and cut into slices (on a thickness of about 1 cm). Soak them in water with a little of salt, then   dry them thoroughly. Grill the aubergine slices in order to get our two parts of the sandwiches.

2. Sandwich ready in ... 3, 2, 1
The next step is to find similar pairs of aubergines slices, and fill these parts with cooked ham and your favourite cheese (in my case: havarti light). Once your sandwich is OK, grill again until the cheese melts.

IMPORTANT NOTE: I'd like to dedicate this easy recipe to my cousin Fernan (who said it to me), for being such a great host with my sister in Whistler (British Columbia, Canadá) 🇨🇦. Good luck on your adventure! We all love you!


domingo, 7 de agosto de 2016

RÖSTI DE PATATAS CON PALOMETA AHUMADA


Ingredientes
- Patatas (500 g)
- Queso emmental rallado (100 g)
- Palometa ahumada
- Queso blanco (para untar)
- Margarina                                
- Eneldo fresco
- Sal
- Pimienta

1. Preparación de las tortillas de patatas
Pelar y lavar las patatas, y cortarlas a tiritas muy fina: necesitamos patas paja. Lo mejor es ayudarnos de una mandolina para conseguirlo. A continuación, se ponen en un recipiente junto con el queso emmental y se mezcla todo, añadiendo sal y pimienta (al gusto).
Para freírlas en la sartén, utilizamos margarina y vamos colocando pequeñas tortitas de la mezcla anterior, que deberemos dorar por ambos lados (primero a fuego fuerte y luego suave).

2. Decoración
Se mezcla el queso de untar con el eneldo, para después colocarlo sobre las tortillas junto con una loncha de palometa (o salmón, lo que más os guste). ¡Facilísimo!

************************


Ingredients
- Potatoes (500 g)                                                                                                   
- Grated emmental cheese (100 g)
- Smoked pomfret
- White cheese spread                                          
- Margarine                                                
- Fresh dill                                                         
- Salt
- Ground pepper

1. Preparation of the potatoes
Peel and wash the potatoes in order to cut them into fine strips. You'll do the best if you have a mandolin. Then, put them into a bowl and add the grated emmental cheese, mixing everything with a little of salt and pepper.
In a frying pan, add margarine and put into small amounts of the potatoes and cheese. We should fry them until golden brown for both sides (first high heat, then slowly).

2. Decoration
In a small bowl, mix the white cheese spread with the fresh dill, and put on the fried potatoes with a slice of the smoked pomfret (or salmon, what you like the most). It's very easy!

martes, 2 de agosto de 2016

CREMA FRÍA DE ESPINACAS

¿Quién no conoce a Popeye? ¿Quién no sabe que gracias a las espinacas su fuerza se elevaba considerablemente? Pues de este ingrediente tan peculiar y tan de moda en estos tiempos (gracias a los batidos verdes) va nuestra receta de hoy: una forma distinta de tomar espinacas.


Como curiosidad... el nombre de «Pop-eye» /pɒpaɪ/ que literalmente significa en inglés 'Ojo saltón', se refiere en realidad a su ojo tuerto, el cual perdió en alguna de sus batallas como marinero. Y ahora... disfrutad de la receta:


Ingredientes
- 300 g de espinacas
- 50 g de piñones
- 3 yogures naturales
- 1/2 diente de ajo (pelado)
- Zumo de limón (opcional)
- Aceite de oliva (opcional)
- Sal


1. Escaldar y tostar
Por un lado, en una olla con agua hirviendo y sal, escaldamos las espinacas durante 1 minuto; después, las pasamos por agua fría y dejamos escurrir en un colador. El agua de cocción la reservamos (para usarla en caso de que la crema quede demasiado espesa, aunque en este caso particular, no la necesité). Por otro lado, en una sartén se tuestan los piñones a fuego lento (para evitar que se quemen).

2. Batir
En la batidora de vaso añadimos: los yogures, las espinacas, los piñones (aunque dejaremos algunos para decorar), el ajo, y se tritura todo. Una vez que que la crema tenga la consistencia adecuada (usando para ello el caldo de cocción), rectificamos el punto de sal. Dejaremos enfriar nuestra crema en el frigorífico antes de servirla.

3. Opcional
Si se le quiere dar un punto ácido se añadirá el zumo de limón. A la hora de servirla, decorar con piñones y un chorrito de aceite de oliva. ¡Viva la comida sana y fácil de hacer!

PD: Receta original vista en "El Comidista".

************************

We all know Popeye. We all know his superhuman strength was associated with consumption of spinach, what is the main ingredient of today's recipe, because I want to show a different way to eat them. Enjoy it!

Ingredients
- 300 g of spinach leaves
- 50 g of pine nuts
- 3 plain yoghurts
- 1/2 garlic clove (peeled)
- Lemon juice (optional)
- Olive oil (optional)
- Salt

1. Blanch & toast
On the one hand, blanch the spinach leaves in boiling water and salt for a minute; then, refresh them with cold water and let them drain (saving the cooking water). On the other hand, toast the pine nuts in a frying pan over a low heat (to prevent burning).

2. Blend
In the glass of the mixer, introduce: the plain yoghurts, the spinach leaves, the toasted pine nuts (although we save some of them to decorate), the peeled garlic clove, and whisk together. Once the cream gets the desired texture (adding a little of the cooking water, if it is necessary), check the salt. Lastly, Let the cream cold before serve.

3. Optional
It's a good idea, add lemon juice if you like an acidic taste. Also, you can serve the cold soup heat the mash again in the pan with a pair of spoonful of Sherry wine. Then, you can decorate the dish with toasted pine nuts and a dash of olive oil. Enjoy healthy and cooking easy meal!

GuardarGuardar

sábado, 23 de abril de 2016

EMPANADILLAS DE FETA Y CHAMPIÑONES


Ingredientes
- Champiñones (300 g)
- Queso feta (100 g)
- Cebolleta
- 1 Diente de ajo
- Cebollino                                
- Obleas de empanadillas
- Aceite de oliva
- Semillas de sésamo
- Salsa de soja (2 cucharadas)

1. Preparación del relleno (parte I)
Lava los champiñones y córtalos en trocitos muy pequeños. En una sartén se calienta un poco de aceite de oliva y se van rehogando a fuego lento. Mientras tanto, pela y pica el ajo y el cebollino, para después añadirlos a la misma sartén, junto con un puñadito de semillas de sésamo. Remueve todo a fuego lento unos minutitos más (sin que se quemen las semillas, para que no amarguen).

2. Preparación del relleno (parte II)
Lava y pica muy bien la cebolleta y corta en trocitos pequeños el queso feta; todo esto se pone en un recipiente junto con los champiñones cocinados. Mezcla todo, y añade un par de cucharadas de salsa de soja. ¡Relleno en su punto!

3. Empanadillas
Preparar las empanadillas es supersencillo: en cada oblea, se pone una cucharada de relleno en el centro, y a continuación, se dobla por la mitad sellando los bordes con ayuda de un tenedor. En una bandeja de horno, coloca todas las empanadillas sobre una hoja de papel vegetal. Se hornean en, aproximadamente, 15 minutos a 180 ºC. ¡Listas para hincarles el diente!

************************


Ingredients
- Mushrooms (300 g)                                                                                                   
- Greek feta cheese (100 g)
- Scallion
- 1 Garlic clove                                          
- Chives                                                 
- Circular small pasty                                                         
- Olive oil
- Sesame seeds
- Soya sauce (2 spoonfuls)

1. Preparation of filling (part I)
Wash and cut into small cubes the mushrooms. Then, fry them lightly with a little olive oil. While the mushrooms are cooked, peel and chop the garlic and the stalks of chive and add these products and a handful of sesame seeds to the frying pan. Stir everything a pair of minutes (to prevent seeds burning) and, lastly, remove the frying pan from the heat.

2. Preparation of filling (part II)
Wash and chop the scallion and cut into small dices the greek feta cheese. Then, add these ingredients to the cooked mushrooms. Mix everything, adding a pair of spoonful of soya sauce. We've just finished the filling!

3.  Small pasties
It's so easy to make small pasties: all you have to do is to add a spoonful of the filling in the middle of the circular pasty, and then, fold the dough in half and push the edges with a fork. Bake all the small pasties into the oven preheated to 180ºC for 15 minutes. It's a meal you can sink the teeth into!