viernes, 11 de diciembre de 2015

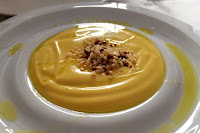
CREMA DE CALABACÍN


Ingredientes
- 1 puerro
- 1 patata (pequeñita)
- 2 calabacines
- Agua
- Aceite de oliva
- Sal
- Pimienta
- Margarina (opcional)
- Jamón cocido (opcional)


1. Rehogamos y cocemos las verduras
Después de lavar, pelar y cortar las tres verduras que vamos a utilizar (puerro, patata y calabacín), se echa un poco de aceite en la olla que vayamos a usar y se rehoga a fuego lento el puerro. Una vez que está blandito, se añaden los trocitos de patata y calabacín, sal y pimienta (al gusto) y se mueven todos los ingredientes unos minutos  antes de añadir el agua necesaria para que cuezan nuestras verduras.

2. Batir con cuidado
Una vez que la patata esté blandita, retiramos del fuego y pasamos a batir para obtener la crema de calabacín (con cuidado, para no quemarnos). Hay que tener en cuenta el ir controlando la cantidad de caldo que añadimos a la batidora para que la textura de la crema tenga la consistencia deseada.

Y ahora tenemos dos opciones: Si tenéis demasiada hambruna podéis tomar la crema tal cual, pero si podéis esperar unos minutos más, podéis rehogar en una cacerola un poco de jamón cocido con una "nuez" de margarina para después añadir la crema recién batida, removiéndola a fuego lento para que la margarina se integre perfectamente en el guiso. Con un poco de pimienta por encima, os quedará un plato sabroso y típico de invierno.

************************


Ingredients
- 1 leek
- 1 little potato
- 2 courgette
- Water
- Olive oil
- Salt
- Ground pepper
- Margarine (optional)
- York ham (optional)


1. Lightly fry and boil the vegetables
After cleaning, peeling and cutting the three kind of vegetables we are going to use (leek, potato and courgette), we add a little of olive oil in the pan we are make use to cook, so that, first we lightly fry the leek. Then, once the leek is soft, we add the potato and courgette dices, salt and ground pepper to taste, and we stir everything before pouring the needed water to boil our vegetables.

2. Blend carefully
When the potato is cooked (soft), we remove the pot from the heat, and we use the mixer to form the courgette cream (be careful to avoid burns). Keep in mind that it is necessary to control the quantity of broth we add to the mixer in order to obtain the cream with the desire texture.

To finish there are two options: Obviously, if you are starving, you can delight the cream, but if you can wait some minutes, you can lightly fry York ham with a little of margarine in a pan, and then, the courgette cream should be added in it, stirring everything to integrate the flavour of the margarine in the dish. Season with a little of ground pepper on top, and it's time to enjoy this tasty and typical winter cream.

martes, 20 de octubre de 2015

PORRA DE NARANJA (receta tradicional de Antequera)


Después de mi visita de fin de semana a Antequera, tengo que decir que además de disfrutar de una sesión cultural (estuve viendo los dólmenes de Menga, Viera y el Tholos del Romeral) mi paladar se encontró con una sorpresa muy agradable al almorzar en el restaurante Arte de Cozina, donde su propietaria, Charo Carmona, se ha encargado de recuperar, entre otras cosas, recetas que hoy en día han dejado de hacerse en nuestras casas.

¿Pensabábais que era posible encontrar una porra cuya base no fuera el tomate, sino que en su lugar fuera de color blanco o amarillo (con sabor a naranja)? Pues sí. La explicación que nos dio fue que antiguamente no había tomates en invierno y con la naranja (fruta típica de la estación invernal), en lugar del vinagre, se le podía aportar un toque de acidez (o agraz) a la humilde sencillez de la base de la porra (pan, ajo y aceite). Y es que los gazpachos (en general) surgieron de la necesidad que tenían los campesinos de alimentarse de lo que la tierra les aportaba y, por eso fueron humillados durante muchos siglos por los ciudadanos más ricos, tal y como recuerda el refrán popular: "Entre pueblo y populacho hay la misma diferencia que entre jamón y gazpacho". Aunque para mí, la porra de naranja ha alcanzado el nivel de comida delicatessen. Si los adinerados la hubieran probado, hoy sería uno de los platos más famosos de nuestra gastronomía.


Ingredientes
- 1/2 litro de zumo de naranja natural (colado). Ver truco nº 4.
- 1/2 kg de pan cateto (del día anterior)
- 1 diente de ajo
- 150 ml de aceite de oliva virgen extra
- Sal


1. Preparados, listos, ya!
Primero hacemos el zumo de naranja y lo colamos. Después se pone el pan en remojo en el zumo durante una media hora o hasta que esté empapado. Por último lo ponemos en nuestra batidora de vaso, con el diente de ajo, el aceite y la sal, y se tritura todo hasta obtener la textura deseada. Podemos servir nuestra porra con unos trocitos de almendras, unas virutas de jamón serrano y un chorrito de aceite de oliva. Sencillamente, deliciosa.

TRUCOS: 1. Después de repetir la receta en casa (las primeras fotos son de la que probé en el restaurante), aconsejo no poner en la batidora todo el pan, sino ir haciendo la mezcla poco a poco para que no se atasquen las cuchillas y sea más sencillo; 2. Si de todos modos todo queda como un mazacote podemos aligerarlo con un poco más de zumo de naranja; 3. Así, después mezclaremos todas fases para que el sabor de toda la porra sea homogénea. 4. La experiencia me indica que lo mejor a la hora de calcular la cantidad de zumo de naranja que vamos a necesitar es: primero, pesar el pan (por ejemplo, si son 200 g) y después, hacer el doble de esta cantidad de zumo en mililitros (tendríamos que hacer 2 · 200 = 400 ml de zumo). Así sale perfecto.

************************

After my last weekend in Antequera (a beautiful village of Malaga) I have to say that I have enjoyed visiting Dolmens of Menga and Viera, and Tholos of Romeral, and furthermore, I have discovered a great place called Arte de Cozina to have lunch, where its owner has been turning to traditional recipes in order to show what kind of dishes people used to eat some decades ago.

Do you think it is possible to eat a 'porra' (or cold tomato soup) without tomato? Yes, it is. The answer to this question is because tomatoes were formerly summer products, and peasants used to  use oranges (typical winter fruit) instead of vinegar in order to add the touch of acidity that this typical dish needed. As the saying goes in my country: "Between village people and plebs, there is the same difference between ham and 'gazpacho'", where is shown that this kind of dish was part of the diet of poor people. But, I am sure that if wealthy people had tasted 'porra' of orange, nowadays it would be one of the most famous recipe in our gastronomy.

Here is the recipe:


Ingredients
- 1/2 litre of natural orange juice (filtered). Read trick nº 4.
- 1/2 Kg of country bread (form the day before)
- 1 garlic clove
- 150 ml of olive oil
- Salt


1. Steady, ready, go!
First we should make and filter the orange juice. After that, the country pan should be wetted with the juice for about 30 minutes or until it is soaking. Lastly, we put this mixture in the glass of the mixer, adding the garlic glove, the olive oil and a little of salt, and blend everything until you get the 'porra' becomes homogenous. We can serve this cold soup with little pieces of almonds, some serrano ham shavings and a dash of olive oil. It's simply delicious.

TRICKS: 1. After making the recipe in my own kitchen (the first two pictures were taken in the restaurant), my advice is to blend the mixture little by degrees in order to help the blender blades work well; 2. If the mixture gets too thick, we can add more orange juice; 3. Only, we should mix again all the portions until the porra is served. 4. My own experience show me that the best way to calculate how much orange juice we have to make is: first, weight the bread (for instance, if we have 200 g) and second, make about double that account in mililiters (we should make 2 · 200 = 400 ml). It comes out perfect.


jueves, 20 de agosto de 2015

ENSALADA TEMPLADA DE POLLO, ESPINACAS Y MELOCOTONES


Ingredientes
- Pechugas de pollo
- Melocotones
- Cebolla fresca
- Espinacas frescas
- Hojas de radicchio
- Ajo
- Vinagre de jerez
- Miel
- Mostaza de Dijon
- Salsa de soja
- Aceite oliva
- Sal
- Pimienta molida
- Semillas de sésamo


1. ¡Al rico pollo!
Tras limpiar las pechugas (un par de ellas), las salpimentamos, y las marcamos en una plancha con unas gotas de aceite (unos 5 minutos por cada lado). Después, las asamos en el horno a unos 190 ºC durante unos 7 minutos (así evitaremos que queden aceitosas en nuestra ensalada).

2. La súper-vinagreta
Para preparar la vinagreta, picamos un diente de ajo, lo ponemos en un cuenco, y añadiremos el resto de ingredientes en las siguientes proporciones, batiéndolo todo con ayuda de un tenedor:


3 cucharadas de vinagre de jerez + 1 cucharada de miel + 2 cucharadas de mostaza +
 1 cucharadita de salsa de soja + 9 cucharadas de aceite de oliva

3. Ensalada finalizada
Se lavan las espinacas y se ponen en los platos donde vayamos a servir la ensalada (después de escurrirlas muy bien), añadimos las hojas de radicchio y la cebolla (cortadas en juliana), además de las pechugas de pollo cortadas en tiras. Pelamos los melocotones y los ponemos a la plancha antes de añadirlos a la ensalada. Por último, la aderezamos con la vinagreta y la espolvoreamos con las semillas de sésamo. Y, ¡aaaa disfrutaaaarlaaaa!

************************

Ingredients
- Chicken breasts
- Peaches
- Fresh onion
- Fresh spinach
- Radicchio leaves (or red cabbage)
- Garlic
- Sherry vinegar
- Honey
- Dijon mustard
- Soy sauce
- Olive oil
- Salt
- Ground pepper
- Sesame seeds


1. What a savory chicken!
After cleaning a pair of chicken breasts, season them with salt and pepper, and griddle them with a few drops of olive oil for about 5 minutes on each side. To finish, these breasts should be cooked in the oven at 190 ºC for about 7 minutes more (in this way, we get a non-oily salad).

2. Super-vinaigrette
To make the vinaigrette, chop a garlic clove, put it in a bowl, add the rest of the ingredients (following the proportions given) and stir the mixture thoroughly with a fork:

3 spoonfuls of sherry vinegar + 1 spoonful of honey + 2 spoonfuls of mustard +
1 teaspoon of soy sauce + 9 spoonfuls of olive oil

3. Finished salad
After washing and draining the spinach, arrange in a platter, add some chopped radicchio leaves and onion, and also the chicken breasts cut into strips. Then, peel the peaches and griddle them before adding to the salad. Finally, dress our warm salad with the vinaigrette and pour it with sesame seeds. Enjoy it!

miércoles, 12 de agosto de 2015

MELÓN CON JAMÓN


Ingredientes
- Melón
Jamón serrano (lonchitas finas)
- Tomate
- Perejil
- Albahaca
- Aceite de oliva
- Vinagre de jerez
- Sal
- Pimienta molida


1. Melón y jamón
Se corta el melón en rodajas quitándole las pipas, se coloca en los platos que vayan a servirse y se cubre con las lonchas de jamón serrano.

2. Tomate y vinagreta
Aunque lo ideal es escaldar los tomates en agua hirviendo para pelarlos más fácilmente y también quitarles las simientes, en este caso (tal y como se aprecia en la foto) simplemente los corté en trocitos pequeños quitándole la parte central dura (eso sí). A continuación, se ponen los tomates cortaditos en un cuenco, y se le añaden un puñado de hojas de perejil y otro de hojas de albahaca (bien lavadas y picaditas). Se le echa a esta mezcla un poco de sal, pimienta, un chorrito de vinagre y otro más abundante de aceite de oliva. Y por último, se remueve toda esta vinagreta antes de rociar nuestro melón con jamón con ella. Dulce + Salado = Qué deliciosa combinación. ¿Quién se atreve a probarlo?

************************

Ingredients
- Melon
- Serrano ham (thinly sliced)
- Tomato
- Parsley
- Basil
- Olive oil
- Sherry vinegar
- Salt
- Ground pepper


1. Melon & serrano ham
Cut the melon into slices removing the pips, place them on the serving plates and cover them with the sliced serrano ham.

2. Tomato & vinaigrette
Although the best way is to scald the tomatoes in boiling water to peel them easily and also remove the seeds, in this case (as you can see in the picture) I only cut them into tiny pieces removing only the tough core part. Next, tomatoes are placed in a bowl, adding a handful of parsley leaves and other one of basil leaves (washed and chopped). It's time to pour the mixture with a little of salt, ground pepper, a dash of vinegar, and another greater of olive oil. Finally, stir all this vinaigrette before pouring our melon with serrano ham with it. Sweet + Salty = What a delicious combination. Who dare to taste it?

sábado, 1 de agosto de 2015

SORBETE DE SANDÍA


Para combatir el calor que está haciendo estos días, no hay nada mejor que tomarte un buen y refrescante sorbete. El mejor escenario para disfrutar de él es quedarse en casa, con las persianas echadas, un poco de aire acondicionado, ... y NADA de terrazas, que sí, que sí, lo prometo; y es que los que seáis de Málaga comprenderéis de qué estoy hablando: EL TEMIDO TERRAL. Os dejo algunas expresiones que pueden escucharse en las calles de mi ciudad estos días:

"Hoy hace terral", "En la calle cae fuego", "No se puede ni respirar", .... y mi favorita (la más castiza) "NOOOVE QUÉ CALÓ, VIEO" (que podría transcribirse al castellano como: "No veas qué calor, viejo" sin que tengamos que referirnos a personas ancianas). ¡Que no, no somos exageraos, ni ná! (es un mito).


Ingredientes
- Fresas                  (6 - 8 uds., dependiendo del tamaño)
Sandía (fría)         (600 g)
- Menta fresca        (5 hojas)
- Zumo de lima
- Cubitos de hielo     (4 uds.)

NOTA: Con estas cantidades salen aproximadamente 2 buenas raciones de sorbete.


1. ¡Batidora, a tope!
Cortar las fresas y la sandía para facilitarle el trabajo a la batidora. Lavar bien las hojas de menta. Añadir a la batidora todos los ingredientes (fresas, sandía, hojas de menta y zumo de lima). Batir hasta que quede homogéneo. Por último, agrega los cubitos de hielo y vuelve a batir. Guárdalo en la nevera si no lo vas a consumir en el momento porque lo mejor es tomarlo bien frío.

************************

To beat the heat these days, the best way is to drink a proper and refreshing sorbet. And the best place to have it is to stay at home, with closed blinds and windows, switched on air conditioner, .... and without going out if it isn't strictly necessary. If you are from Malaga, you will know what I am talking about: THE FEARED "TERRAL" (a typical wind that came from the land). I am going to translate literally some of the expressions you could heard in the streets of my city on these days:

"Today, it is terral", "In the street, fire is coming down", ... and my favourite (so authentic in my language): "You may not see what heat, old man". In Malaga, we aren't usually exaggerated, it's only a myth!


Ingredients
- Strawberries                 (6 - 8 pieces, depending on the sizes)
- Watermelon (chilled)      (600 g)
- Fresh mint                    (5 leaves)
- Lime juice
- Ice cubes                       (4 cubes)

NOTE: With these quantities of ingredients I made about 2 large glasses of sorbet.


1. Mixer to work!
Cut into pieces both fruit (strawberries and watermelon). Wash properly the mint leaves. Add to the mixer all the ingredients (strawberries, watermelon, mint leaves and lime juice) and blend them together until the mixture is homogeneous. Finally, add ice cubes and blend again. Keep in the fridge if you are not going to taste it immediately, so that, sorbet gets cold enough to drink. 


lunes, 27 de julio de 2015

GUINDILLAS VASCAS "EMBOTADAS"


Después de la primera cosecha de guindilla vasca de nuestro huerto urbano (en macetas), viendo que la producción iba a ser bastante abundante y que no iba a ser posible consumirlas (sin que se echaran a perder, debido a lo picantes que resultan), nos pusimos a buscar en la red la mejor manera de degustarlas y guardarlas. De este modo, dimos con una receta muy sencilla para conservarlas en el frigorífico (durante unos 2 años), con las que podremos preparar el "pintxo" de guindillas por excelencia de Guipúzcoa que se conoce como "gilda".


Ingredientes
- Guindillas vascas
- Vinagre de vino blanco
- Sal
- Agua mineral

IMPORTANTE: Necesitamos un bote de cristal que cierre herméticamente.

1. ¡A embotar!
Lo primero será lavar las guindillas bajo el grifo y procurar que sean de un tamaño similar y que puedan adaptarse al bote de cristal que tengamos.

Después, se llena una cuarta parte del envase elegido con el vinagre, se le añade sal (entre media cucharadita y una, en función de su tamaño), y se llena con agua mineral hasta la mitad del bote. Cerramos y se agitan todos los ingredientes.

El último paso será ir colocando las guindillas en el bote y lo ideal es que queden apretaditas. Si le falta líquido, sólo hace falta añadir un poquito de agua. Guardar el bote en el frigorífico.

2. Larga espera ...
Ahora sólo hace falta esperar 3 meses antes de consumirlas. Sólo a partir de ahí podremos disfrutar de ellas.

Nosotros seguiremos esperando ...


NOTA: La receta está tomada del blog SALSEANDO EN LA COCINA, donde podréis encontrar más información acerca de este producto típico vasco.


************************


After the first harvest of Basque chilli (from our urban garden), we realized that we weren't able to eat them without being spoiled because of their heat level. So that, we were surfing the internet in order to find a good method to taste and store the chillis. With this preparation, it will be posible to make a typical "pintxo" from Guipuzcoa, called "gilda".


Ingredients
- Basque chillis
- White wine vinegar
- Salt
- Still mineral water

IMPORTANT: A glass jar with lid is required.

1. Preparation
First, wash the chillis under cold running water, and select similar sizes in order to keep in the glass jar we have.

Then, fill up one-quarter of the jar with white wine vinegar, add between one half or complete spoonful of salt (depending of the capacity of the container), and fill up one-quarter more with still mineral water. And, close it and shake vigorously.

Finally, put the Basque chillis inside, making sure that they are tightened properly. Keep the glass jar in the fridge.

2. Long wait ...
It's time to waiting as long as three months before tasting them. Then, we can try them.

We are still waiting ...


NOTE: This recipe is taken from the blog SALSEANDO EN LA COCINA (it could be translated as "Saucing in the kitchen"), where you can find more information about this typical Basque product.

viernes, 24 de julio de 2015

BERENJENAS A LA PARMESANA


Me encanta Kitchen Stories, tanto sus recetas, como sus fotos y sus videos explicativos invitan a hacer platos nuevos e innovar en la cocina. Os recomiendo que le echéis un vistazo a esta aplicación, de origen berlinés, diseñada para dispositivos móviles (en el caso de que no la conozcáis ya) porque hasta el logo es sencillo y bonito -una varilla de batir sobre un fondo amarillo-.

Por eso, la receta de hoy está tomada de uno de sus tutoriales, aunque las fotos las hice yo misma en mi propio centro de operaciones (mi preciosa cocina-laboratorio). Además, puedo prometer y prometo que estos profesionales de la cocina no se han puesto en contacto conmigo, ¡ojalá lo hicieran!


Ingredientes
- Cebolla                 (1 ud.)
- Diente de ajo         (1 ud.)
- Romero                (1 cucharada)
- Albahaca fresca     (6 cucharadas)
- Orégano               (2 cucharaditas)
- Tomillo                 (2 cucharaditas)
- Berenjenas            (3 uds.)
- Tomate natural en lata (en trocitos)    (750 g)
- Tomate seco          (3 uds.)
- Mozzarella fresca    (500 g)
- Queso parmesano rallado (para seguir la receta original) u otro queso que funda
- Aceite de oliva
- Sal
- Pimienta molida


1. ¡Salsa de tomate!
Se corta la cebolla en trozos pequeños y se pica el ajo, y ambos ingredientes se doran en una olla grande con aceite de oliva a fuego medio-alto durante unos 5 - 7 minutos (hasta que queden transparentes). A continuación se añade el tomate seco hecho trocitos pequeños (o bien, una cucharada de concentrado de tomate) y se sigue salteando todo unos 2 minutos más.

Después, se añade el tomate natural en lata (que habrá que trocear en caso de que vengan enteros) y se deja cocer a fuego lento. Y se agrega a esta salsa la sal, la pimienta molida, el orégano, el tomillo y el romero (troceadito), según las cantidades de nuestra lista de ingredientes. Tendremos que dejar cocer todo a fuego lento durante aprox. 10 - 15 minutos.

2. Berenjenas y mozzarella
Para esta receta, lo mejor es cortar las berenjenas de forma longitudinal y de un grosor de algo menos de 1 cm (así obtendremos rodajas más largas). Una vez cortadas, se pasan por la sartén con un poco de aceite de oliva para dorarlas por ambos lados durante unos 2 - 3 minutos aprox. Y se reservan sobre un plato.

La mozzarella debe cortarse a rodajas más o menos del mismo grosor que las berenjenas. De este modo, con todo listo, es más fácil llevar a cabo el último paso.

3. Horneado
En una fuente de horno, se coloca una primera capa de berenjenas, otra de mozzarella y otra de salsa de tomate y, después se repite de nuevo (berenjenas, mozzarella y salsa de tomate). Se cubre con la albahaca fresca troceada y con queso parmesano (o algún otro queso que se funda) y se deja en el horno precalentado a unos 180ºC durante aprox. 20 - 25 minutos hasta que se dore. No te olvides de decorarlo con algunas hojas de albahaca fresca cuando lo vayas a servir, y asegúrate de tomarlo caliente (pero sin achicharrarte).


************************


I enjoy reading and watching Kitchen Stories, all the recipes, the pictures and their tutorial videos invite us to innovate in the kitchen. I strongly recommend this mobile app (born in Berlin) if you don't know it yet because even the logo is simple and nice.


For this reason, today's recipe has been taken from one of their tutorials, although the pictures were taken by myself in my own hub (my beautiful kitchen-laboratory). Furthermore, I can promise that this team of professional chefs haven't contacted me looking for advertising, if only that were so!


Ingredients
- Onion                 (1 piece)
- Garlic clove          (1 piece)
- Rosemary           (1 spoonful)
- Fresh basil          (6 spoonful)
- Oregano              (2 teaspoonful)
- Thyme                (2 teaspoonful)
- Aubergines          (3 pieces)
- Canned natural tomatoes (chopped)    (750 g)
- Sun dried tomatoes     (3 uds.)
- Fresh mozzarella     (500 g)
- Grated Parmesan cheese (to make the original recipe) or other kind of cheese to melt
- Olive oil
- Salt
- Ground pepper


1. Tomato sauce!
Cut the onion in small cubes and chop the garlic clove, and lightly fry these ingredients in a large pan with olive oil at medium-hight heat for about 5 - 7 minutes (until transparent). Then, add chopped sun dried tomatoes (or, a spoonful of tomato concentrate), and continue cooking for another 2 minutes.

After that, add the canned natural tomato (chopped) and cook over a low heat. Now, season with salt, ground pepper and aromatic herbs (oregano, thyme and rosemary) according to the quantities listed above. Cook over a low heat the tomato sauce for about 10 - 15 minutes.

2. Aubergines and mozzarella
To make this recipe, the best option to slice the aubergines is doing a longitudinal cut with a thickness of less than 1 cm. Then, these slices should be grilled on both sides in a frying pan with a little of olive oil for about 2 - 3 minutes. Leave aside in a plate.

Mozzarella sould be sliced with more or less the same thicknees than the aubergines. In this way, it will be easier to finish our dish.
3. Baking
In an oven dish, put a first layer of aubergines, another one of mozzarella and, finally, add the tomato sauce. Repit again (auberines, mozarella and tomato sauce). Cover with chopped fresh basil and grated Parmesan cheese (or other kind of cheese to melt). It's time to put it into the preheated oven at 180ºC for about 20 - 25 minutes until golden brown. Before eating it, decorate with some fresh basil leaves and be sure to have it hot (without scorching).