domingo, 4 de marzo de 2018

TARTA DE QUESO (sin huevo)


Aunque en mi casa no solemos celebrar el día de San Valentín, este año quise preparar una tarta de queso para mi "cómplice" en la vida, como sorpresa en el "día oficial de los enamorados", ya que éste es uno de sus postres favoritos (y el pobre llevaba siglos pidiendo que le hiciera una).

Pensaba que me faltarían los utensilios necesarios para preparar una, pero con esta fácil receta no se necesitan ni molinillo, ni varillas eléctricas, ni microondas, ni horno.


Ingredientes
- 25-30 galletas
- 60 g de mantequilla (sin sal)
- 400 g queso crema (aproximadamente. 1 tarrina y media de Philadelphia) 
- 400 ml de nata para montar (35% de materia grasa)
- 80 g de azúcar
- 4 láminas de gelatina neutra
- Mermelada de arándanos

1. Base de galletas 
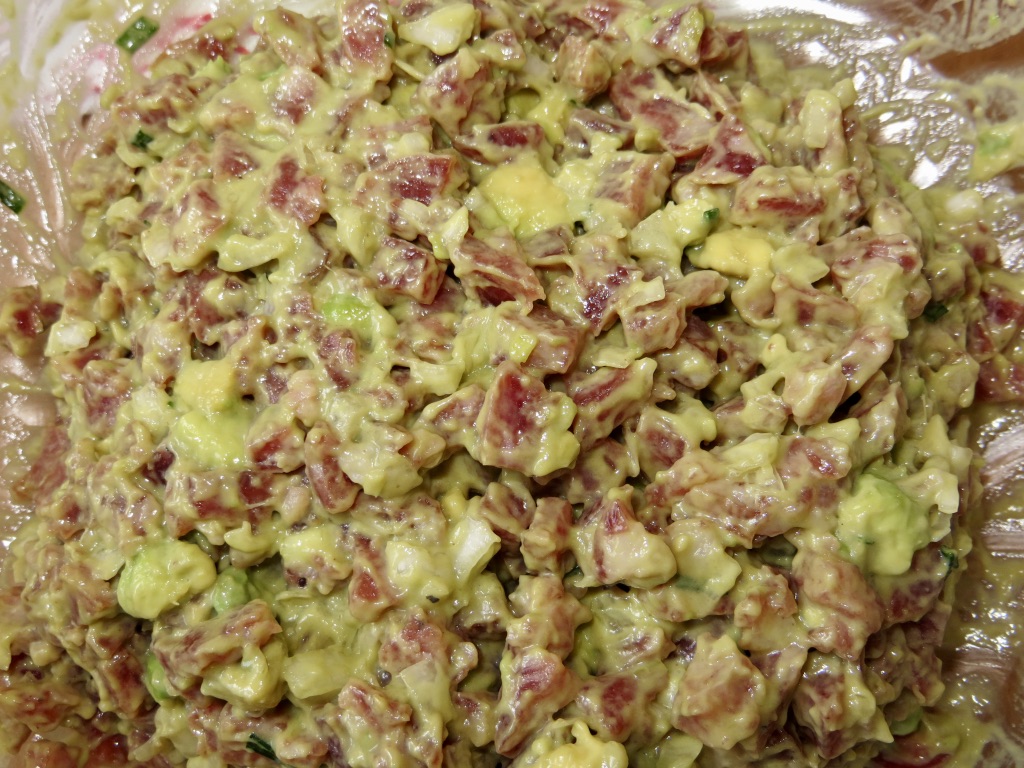
Con ayuda de un mortero vamos machacando las galletas, hasta que parezca arena. En un cazo, derretimos la mantequilla a fuego lento; y después la agregamos a nuestras galletas, removiendo bien, hasta que parezca una especie de pasta.
En un molde (previamente forrado con papel vegetal), vamos compactando la mezcla anterior con ayuda de una cuchara, para formar la base de nuestra tarta. Una vez lista, la reservamos en el frigorífico.

2. Crema
A continuación, ponemos en remojo las hojas de gelatina. Mientras, echamos en un cazo el queso crema, el azúcar y la nata, y calentamos todos los ingredientes a fuego medio-bajo con el fin de que el azúcar se disuelva y la mezcla quede bien integrada (aproximadamente. 10-12, sin dejar de remover). En caso de que queden algunos grumos del queso sin fundir, podemos colar nuestra mezcla.
Una vez fuera del fuego, añadimos las hojas de gelatina (previamente escurridas) y removemos bien nuestra crema.

3. "Al frigorífico"
Vertemos la mezcla sobre nuestra base de galletas, y dejamos que se enfríe a temperatura ambiente antes de dejar que repose y cuaje en el frigo durante unas 6-8 horas (aunque mi recomendación es hacerla de un día para otro).

4. Decoración
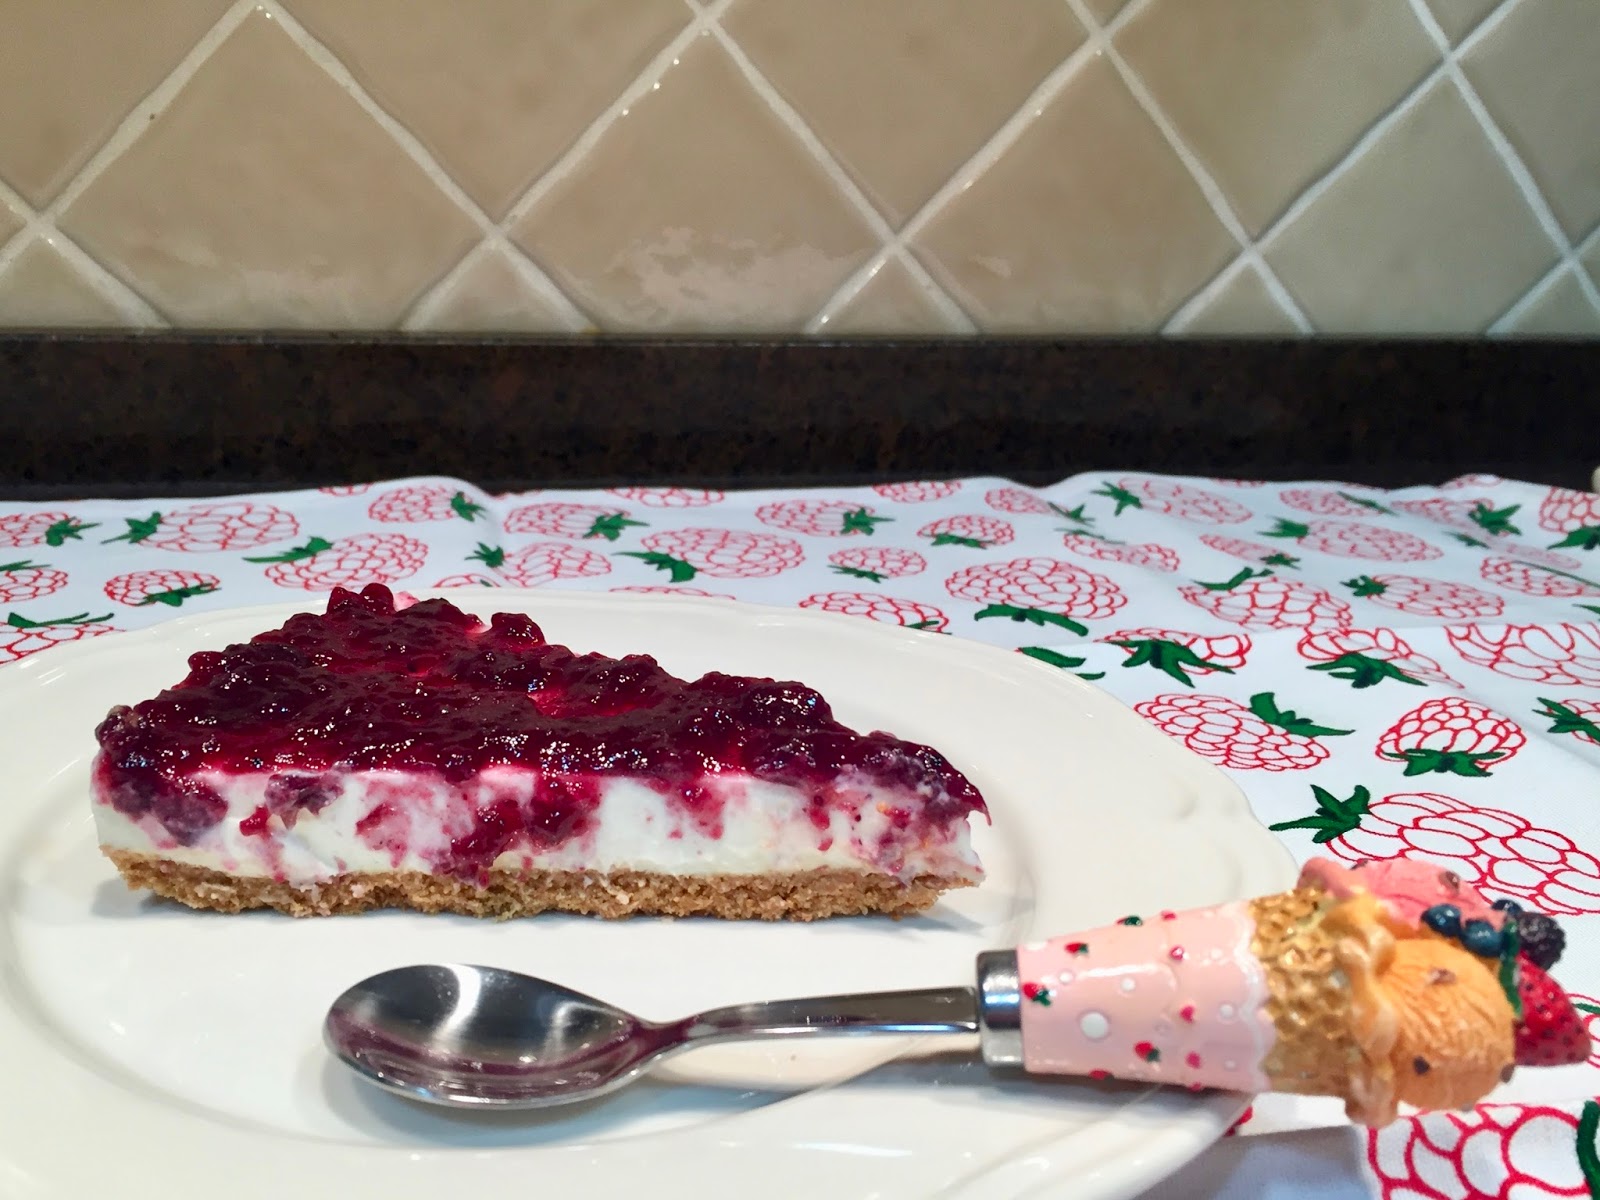
Antes de desmoldarla, añadimos la mermelada que más nos guste. En este caso, utilicé mermelada de arándanos (pero antes de untarla sobre la tarta, es mejor removerla en un pequeño bol para que así esté un poco menos pastosa y cueste menos trabajo). Sin lugar a dudas, ¡repetiré pronto la receta!

NOTA: El molde utilizado tiene unos 26 cm de diámetro, por eso la tarta parece "bajita". Por otro lado,  se desmoldó sin problemas.

¡EXITAZO TOTAL!

************************

We don't usually celebrate Valentine's Day at home, but this year I wanted to surprise my fiancé, so I decided to make a cheesecake for him because it is one of his favourite dessert (and he had been asking me to make one for several years). 

I thought I wouldn't have all necessary cooking utensils to prepare one, although with this recipe you don't need special gadgets (no food processor, no wire whisk, no microwave, no oven).


Ingredients
- 25- 30 biscuits
- 60 g butter (without salt)
- 400 g cream cheese (one bowl and half of Philadelphia)
- 400 ml cream (to whip, with 35% fat)
- 80 g sugar
- 4 sheets of unflavoured gelatin
- Blueberry jam

1. Biscuit base
Crush the biscuits in a mortar until obtaining fine crumbs. Melt the butter in a saucepan on low heat. Then, mix the melted butter and the biscuits in order to form a paste that will be the base of the cake.
Line a cake tin with greaseproof paper, and place the prepared mixture pressing it down firmly with the back of a spoon. Once it is ready, place it in the fridge.

2. Cream
First, soak gelatin sheets in cold water. Meanwhile, in a medium saucepan pour the cream cheese, the sugar and the cream, stir and cook this blend on a medium-low heat until the ingredients are well combined (approximately for about 10-12 minutes). Once the cream is ready, if there would be any clump of cheese without melting, we can strain the mixture.
Remove from the heat. Then, squeeze the gelatin sheets, and add them to the cream and stir well.

3. "To the fridge"
Pour the cream over the biscuit base, and let cool at room temperature before chilling in the fridge for about 6-8 hours (although I recommend to make the cheesecake one day before).

4. Decoration
Before removing from the mould, spread our favourite jam. I used blueberry jam (but first, it's a good idea to stir it in a separate bowl in order to make this task easier). I have no doubt that I will make it again!

NOTE: My mould is 26 cm in diameter, for this reason the cheesecake seems low. On the other hand, it was very easy to remove it from the cake tin.

WHAT A SUCCESS!

GuardarGuardar
GuardarGuardar
GuardarGuardarGuardarGuardar

domingo, 4 de febrero de 2018

PIZZA DE KALE


Ingredientes
- Masa de hojaldre
- Tomate natural
- Kale
- Mozzarella fresca
- Orégano
- Pimienta negra molida

1. Preparación de la pizza
Coloca la masa de hojaldre sobre una placa de horno con papel sulfurado. Con un cuchillo haz un corte rectangular en el hojaldre, de manera que sean los bordes de nuestra pizza, y pincha el interior del rectángulo con ayuda de un tenedor. Corta el tomate en rodajas y colócalo sobre la masa. A continuación, coloca las hojas de kale (previamente enjuagadas) y las rodajas de mozzarella. Espolvorea un poco de orégano. Hornea durante unos 20-25 minutos a 180ºC. Sácala del horno cuando esté doradita, y añada un poco de pimienta molida. ¡No has probado pizza más ligera!

************************

Ingredients
- Pastry dough
- Tomato
- Kale
- Fresh mozzarella
- Oregano
- Ground pepper

1. Making pizza
Put a pastry dough on an oven tray with greaseproof paper. Do a rectangle with a knife to prepare the edges of the pizza and prick the interior of the rectangle with a fork. Cut the tomato into slim slices and put over the dough. Then, place over the kale leaves (previously washed) and the slices of fresh mozzarella. Season with oregano. Bake the pizza into the oven preheated to 180ºC for 20-25 minutes until brown. Once out of the oven, spread a little of ground pepper. You have never tasted such a light pizza! 


domingo, 14 de enero de 2018

POLLO A LA MORUNA


Este fue el plato principal que preparamos para la cena de Nochebuena. Tengo que decir que nos resultó un poco complicada la receta debido a que tuvimos que guisar un par de pollos completos, y no estamos acostumbrados a manejar cantidades tan grandes cuando cocinamos, pero el resultado mereció la pena. Aquí dejaré las cantidades de ingredientes necesarias para 4 personas.


Ingredientes
- 1 Pollo troceado (con huesos)
- Ras el hanout (mezcla de especias marroquíes que contiene entre otras: pimienta, comino, canela, pimentón, jengibre, etc.)
- 3 Cebollas grandes
- Pasas
- Ciruelas pasas
- Rama de canela
- Almendras crudas (sin piel)
- Piñones crudos
- Sal
- Aceite de oliva

1. Preparación del pollo
Lo mejor es pedirle al carnicero que nos limpie y trocee el pollo, y en casa lo terminamos de limpiar bien. Una vez que lo tenemos listo, ponemos el pollo en un bol grande y le añadimos un par de  cucharadas de aceite y una cucharada y media de nuestra mezcla de especias, masajeando los trozos con las manos para que todos queden impregnados.

A continuación, ponemos a calentar aceite en una cacerola, para ir friendo el pollo poco a poco. No es necesario que quede demasiado dorado, es preferible dejarlo semi-frito (ya que después estará más tiempo al fuego), por lo que vamos sacando las tajadas cuando tengan el punto óptimo y las reservamos en una fuente.

2. Pasas y cebollas
Dejamos en remojo un puñado de pasas. Y pelamos y picamos las cebollas. El secreto de esta receta está en que no podemos quedarnos cortos de cebolla, así que si son pequeñitas, añadimos alguna más.

En la misma cacerola en la que hemos frito el pollo, añadimos las cebollas con un poco de sal, y las sofreímos a fuego medio junto con una rama de canela y una cucharada adicional de ras el hanout. Cuando estén pochaditas, añadimos el pollo que habíamos reservado y removemos todo. Lo dejamos que se vaya cocinando y lo vamos moviendo y ajustando el fuego, de manera que se vaya espesando la salsa de cebolla.

3. Almendras y piñones
En una sartén aparte, tostamos un puñado de almendras y otro de piñones (ten cuidado de no quemarlos).

4. Guiso final
Cuando nuestro guiso está casi punto (con la salsa espesita y el pollo tierno), añadimos las pasas (previamente escurridas), las almendras y piñones tostados, y las ciruelas pasas (abriéndolas por la mitad). Removemos todo y lo dejamos cocinar unos 10-12 minutos más para que se integren todos los sabores. Simplemente, un plato de 10.

RECOMENDACIÓN: Este tipo de plato está más bueno si se hace de un día para otro. Así que, si a la hora de calentarlo al día siguiente de su elaboración está demasiado espeso, añadimos un poco de agua a la cacerola, removiendo muy bien nuestro guiso, para evitar que se peguen los ingredientes.

************************

This dish was the main course that we made to our Christmas Eve dinner. I have to say that it was a bit complicated recipe because we have to handle a big amount of food and we are not used to. But, the result worthwhile. Here, I leave the required quantities of ingredients for 4 persons.


Ingredients
- 1 Chicken cut into pieces (with bones)
- Ras el hanout (spice mix from Morocco made with: pepper, cumin, cinnamon, paprika, ginger, etc.)
- 3 Big onions
- Raisins
- Prunes 
- Cinnamon stick
- Raw almonds (peeled)
- Raw pine nuts
- Salt
- Olive oil

1. Preparation of the chicken
Ask the butcher to peel and cut the chicken into pieces, and we only have to rinse and dry it before cooking it. Then, put the pieces into a big bowl, add a pair of spoonful of olive oil and a spoonful and a half of the spice mixture, and mix everything with your hands in order to be well spread.

Next, heat enough olive oil in a saucepan to fry the chicken cuts little by little. It is not necessary the pieces brown excessively (because we are going to cook them more time after), so take the pieces out of the saucepan and reserve until finishing the recipe.

2. Raisins and onions
Soak a handful of raisins. Peel and chop the onions. The secret of this recipe is that we have to use enough onions to make a good stew (if they are small, cut more ones).

In the same saucepan we have just used it, add the onions with a little of salt, and lightly fry at medium heat with a cinnamon stick and a spoonful more of ras el hanout. When they are softened, add the chicken cuts and stir everything. Let the meat to be cooked, stirring and adjusting the heat in order to obtain the required finish.

3. Almonds and pine nuts
Toast a handful of almonds and another one of pine nuts in a pan apart (be careful and don't burn up).

4. Final stew
When the stew is almost done (with thick sauce and tender chicken), add the raisins (drained well), the toasted almonds and pine nuts, and the prunes (divided in two). Stir everything and let the stew to be cooked for about 10-12 minutes more in order to combine well all the flavours. Simply, a perfect dish!

RECOMMENDATION: This dish testes better if you cooked the previous day. So, when you have to heat it, you could add a little of water to the stew and stir well in order to prevent sticking the ingredients.


GuardarGuardarGuardarGuardarGuardarGuardarGuardarGuardarGuardarGuardarGuardarGuardar

domingo, 17 de diciembre de 2017

BACALAO AL 'PAPILLOTE'


Ingredientes
- Zanahorias
- Lomos de bacalao
- Sal
- Pimienta molida
- Aceite de oliva
- Pimentón de la Vera
- Acompañamiento: patatas "baby", cebolla morada, pimiento.

1. Horneado
Se pelan y se cortan las zanahorias en bastocitos muy finitos, con la finalidad de que se hagan lo mejor posible en el horno.
A continuación, se lava el pescado y se seca con papel de cocina.
Pincelamos con aceite de oliva las hojas de papel sulfurado, y colocamos encima las zanahorias con un poco de sal y los lomos de bacalao con un poco de pimienta recién molida, y cerramos los paquetitos individualmente.
Se cuece en el horno, a unos 200ºC sobre 20-25 minutos (en función del grosor de los lomos).

2. Acompañamiento
Cortamos en tiras finitas tanto la cebolla, como el pimiento, y las ponemos en una sartén con un poco de aceite de oliva y sal para sofreírlas. Mientras tanto, escurrimos el agua de las patatas baby (ya que vienen envasadas y precocidas), las cortamos en rodajas y las añadimos a la sartén para que se mezclen con el resto de verduras, primero a fuego medio y después bajando un poco el fuego hasta que tengamos que servir.

3. Servir
Para terminar el plato, podemos poner las patatas en el fondo y sobre ellas, el bacalao con un poco de pimentón de la Vera por encima. Sin duda, se trata de una cena sana y deliciosa.

************************

Ingredients
Carrots
- Cod loins
- Salt
- Ground pepper
- Olive oil
- La Vera paprika
- Side dish: Baby potatoes, red onion, green pepper.


1. Baking
Peel and cut the carrots into thin sticks, in order to be cooked into de oven properly.
Then, wash the cod loins and dry them with kitchen paper.
Brush some pieces of greaseproof paper with olive oil, place on them the carrots with a little of salt and the cod loins with a little of ground pepper and wrap the little packets up.
Now, put the oven tray into the preheated oven at 200ºC for about 20-25 minutes (depending on the thickness of the loins).

2. Side dish
Cut the red onion and the green pepper into thin strips, and fry them on a pan with olive oil and salt. In the meantime, drain the baby potatoes (because they are processed and conserved ones), cut into slices and lastly, add them into the frying pan from a medium heat to a lower heat in order to simmer until we have to serve.

3. Serve

To finish, place the potatoes on a plate and the cod on top with a little of "la Vera" paprika. Undoubtedly, it's a healthy and delicious dish.
GuardarGuardarGuardarGuardar

viernes, 25 de agosto de 2017

VERDURAS HORNEADAS

Como comida veraniega es fácil y queda espectacular, solamente que necesitamos un buen cuchillo o mandolina de cocina (ver NOTA), y disponer de tiempo suficiente para que las verduras se hagan en el horno. Así que, échale imaginación y añade tus hortalizas favoritas.


Ingredientes
- Calabacín           (1 ud.)
- Patatas          (2 uds.)
- Berenjenas         (2 uds.)
- Cebolla            (1 ud.)
- Tomates secos     (5 uds.)
- Sal              
- Pimienta molida
- Tomillo
- Aceite de oliva

1. Verduras
Pelamos las patatas, las cortamos en rodajas y las dejaremos en remojo unos minutos antes de escurrirlas y colocarlas en la fuente de horno. Mientras tanto, lavamos y cortamos en rodajas el calabacín y las berenjenas (esta vez, dejándoles la piel). Cortamos la cebolla en tiras más o menos finas, y los tomates secos también.

Con todas las verduras cortadas, es hora de colocarlas en la fuente de horno (exceptuando los tomates secos, que los pondremos al final), que habremos engasado previamente con un poco de aceite de oliva. Después, se les añade sal, pimienta molida, un poco de tomillo y un poco más de aceite de oliva por encima.

2. Horneado
La fuente de verduras se introduce en el horno precalentado a unos 180ºC durante aprox. 1 hora, así que toca esperar. No olvides añadir los tomates secos 4-5 minutos antes de que suene el temporizador, o directamente una vez fuera del horno (le dan un toque muy interesante). Disfrutad de las verduras, aunque no seáis vegetarianos.

NOTA: Nuestra mandolina nos ha sido de gran ayuda a la hora de cortar las verduras, ya que, además de que todas las rodajas han quedado iguales en tiempo récord, hemos conseguido hacer cortes en rejilla de manera muy fácil (con la cuchilla especial y un simple giro de muñeca).

************************

This is an easy food to make and it tastes delicious. The only you need is either a sharp knife or a mandolin (NOTE), and enough time to cook vegetables. So, harness your imagination and add your favourite vegetables.


Ingredients
Courgette                 (1 piece)
Potatoes                    (2 pieces)
- Aubergines               (2 pieces)
- Onion                        (1 piece)
- Sun dried tomatoes   (5 pieces)
- Salt
- Ground pepper
- Thyme
- Olive oil


1. Vegetables
Peel potatoes, slice them thinly and leave them soaking in a bowl; then, drain well and place the slices on an oven tray. In the meantime, wash and slice courgette and aubergines (this time, without peeling). Cut (separately) onion and sun dried tomatoes into strips.

Now, it's time to place all the vegetables (except the sun dried tomatoes strips) on a greased (using olive oil) oven tray. After, season with salt, ground pepper, thyme and pour a little of olive oil above.

2. Baking
Put the oven tray into the preheated oven at 180ºC for about 1 hour. Not forget to add the sun dried tomatoes 4-5 minutes before kitchen timer rings (or even, once outside the oven). Enjoy the vegetables although you aren't a vegetarian).

NOTE:
The mandolin is a good idea in order to cut vegetables evenly and quickly. Furthermore, it allows doing different types of cut easily.

martes, 6 de junio de 2017

BIZCOCHO DE NARANJA (sin huevo ni leche)


Ingredientes
- 250 ml de zumo de naranja
- 125 g de azúcar
- 75 ml de aceite de girasol
- 225 g de harina de repostería
- 1 cucharada de levadura para repostería
- 1 cucharadita de bicarbonato
- Azúcar glas y canela (opcional)

1. Mezclas 
Con ayuda de la batidora de mano, mezclamos el zumo de naranja, el azúcar y el aceite de girasol (mezcla húmeda). A continuación, ponemos en un bol la harina, la levadura y el bicarbonato, y después los tamizamos (con ayuda de un colador) sobre nuestra mezcla húmeda; vamos batiendo con una varilla manual para que se integren todos los elementos.

2. Horneado
Vertemos la mezcla en un molde de horno alargado, que previamente habremos forrado con papel vegetal (esto nos ayudará a la hora del desmolde). La temperatura de horneado será de 170ºC, y habrá que dejarlo durante aproximadamente 40 minutos (pero puedes comprobarlo pinchando el centro del  pastel con una varilla, y viendo si sale seco o no). No olvides dejar que se enfríe. ¡¡¡Bizcocho rápido y fácil de hacer, a la par que delicioso!!!

3. Decoración (opcional)
Se puede decorar con un poco de azúcar glas y canela por encima.

************************

Ingredients
- 250 ml orange juice
- 125 g sugar
- 75 ml sunflower oil
- 225 g cake flour
- 1 spoonful of baking yeast
- 1 teaspoonful of bicarbonate
- Icing sugar & cinnamon (optional)

1. Blends
Mix these ingredients with the hand blender to obtain the wet blend: orange juice + sugar + sunflower oil. Then, put in a bowl the dry ingredients: cake flour + baking yeast + bicarbonate, and sift all of them (with a sieve) over the wet blend, stirring with a whisk until obtaining an homogeneous dough.

2. Baking
Cover a long baking tin with greaseproof paper, and pour the cake dough in it. Bake it in the preheated oven at 170 ºC for about 40 minutes (verify the proper cooking with the help of a stick). Don't forget to allow it to reach the room temperature before eating it. The result is a fast and easy sponge cake to make!!!

3. Decoration (optional)
You can sprinkle with icing sugar and cinnamon before eating it.

viernes, 12 de mayo de 2017

TARTAR DE SALCHICHÓN DE MÁLAGA


Ingredientes
- Salchichón de Málaga
- Aguacate
- Cebolleta
- Cebollino
- Lactonesa (o mayonesa)
- Miel de caña
- Mostaza de Dijon

1. Cortar pacientemente
Tendremos que cortar tanto el salchichón como el aguacate en dados pequeñitos (cuanto más pequeños sean los trocitos de salchichón, mucho mejor), después los colocaremos en un recipiente que nos permita mezclar todos los ingredientes; también picaremos la cebolleta en tiras finas y pequeñas, y la añadiremos al bol, removiendo todos los ingredientes.

2. Preparar la salsa
La salsa que va a permitirnos que nuestro tartar quede más o menos compacto consiste en un pequeño cuenco de lactonesa (receta aquí), al que se añade una cucharada de miel de caña y otra cucharada de mostaza de Dijon. Después, tendremos que remover nuestra salsa para que todos los sabores queden bien integrados, junto con unos tallos de cebollino bien picados.

3. Mezclar y reservar en frío, antes de servir
Una vez lista la salsa, la vamos añadiendo poco a poco a la mezcla de ingredientes, para que así la cantidad de salsa sea la adecuada para obtener un tartar compacto a la vez que cremoso. Una vez terminado, lo meteremos en la nevera hasta que llegue la hora de servirlo. Para la presentación, usaremos un molde. ¡Queda perfecto y riquísimo untado en tostaditas!

PD: Es el primer tartar de salchichón que he hecho, pero no tardaré en repetir. Es muy fácil de hacer, lo más laborioso es ir cortando el salchichón, por eso hay que tener un poco de tiempo y un buen cuchillo.

************************

Ingredients
- Malaga salchichon
- Avocado
- Spring onion
- Chives
- Mayonnaise (made of milk and oil, or made of eggs and oil)
- Cane honey
- Dijon mustard

1. Cut all with patience
We have to cut in very small dices the salchichon, the avocado and the spring onion (the smaller pieces, the better). Then, we put all the ingredients in a bowl in order to mix them together.

2. Make the sauce
To make the sauce, we add a spoonful of cane honey and a spoonful of Dijon mustard to the mayonnaise (you can find my mayonnaise made of milk and oil here), and mix the mixture in order to get an homogenous sauce. Then, we add some chopped chives, stirring again.

3. Mix and let cool, before serving
Now, it's time to pour the sauce slowly over our ingredients, mixing all together because we have to try the amount of sauce is the necessary to obtain a compact but creamy tartar. Once finished, let it cool in the fridge until serving time. Use a mould to present the dish. Perfect and delicious to be spreader on small toasts!

PS:  It is my first salchichón tartar, although I`ll make again. It's very easy, the hardest is to cut the salchichon, so the only you need is to have time and and a good knife.
GuardarGuardarGuardarGuardarGuardarGuardar